Windows: download the User Installer and run it. Accept the licence, keep the default folder, leave Add to PATH ticked, then click Install and Finish. No admin rights needed.
Mac: download the Universal build, open the .zip and drag Visual Studio Code into Applications.
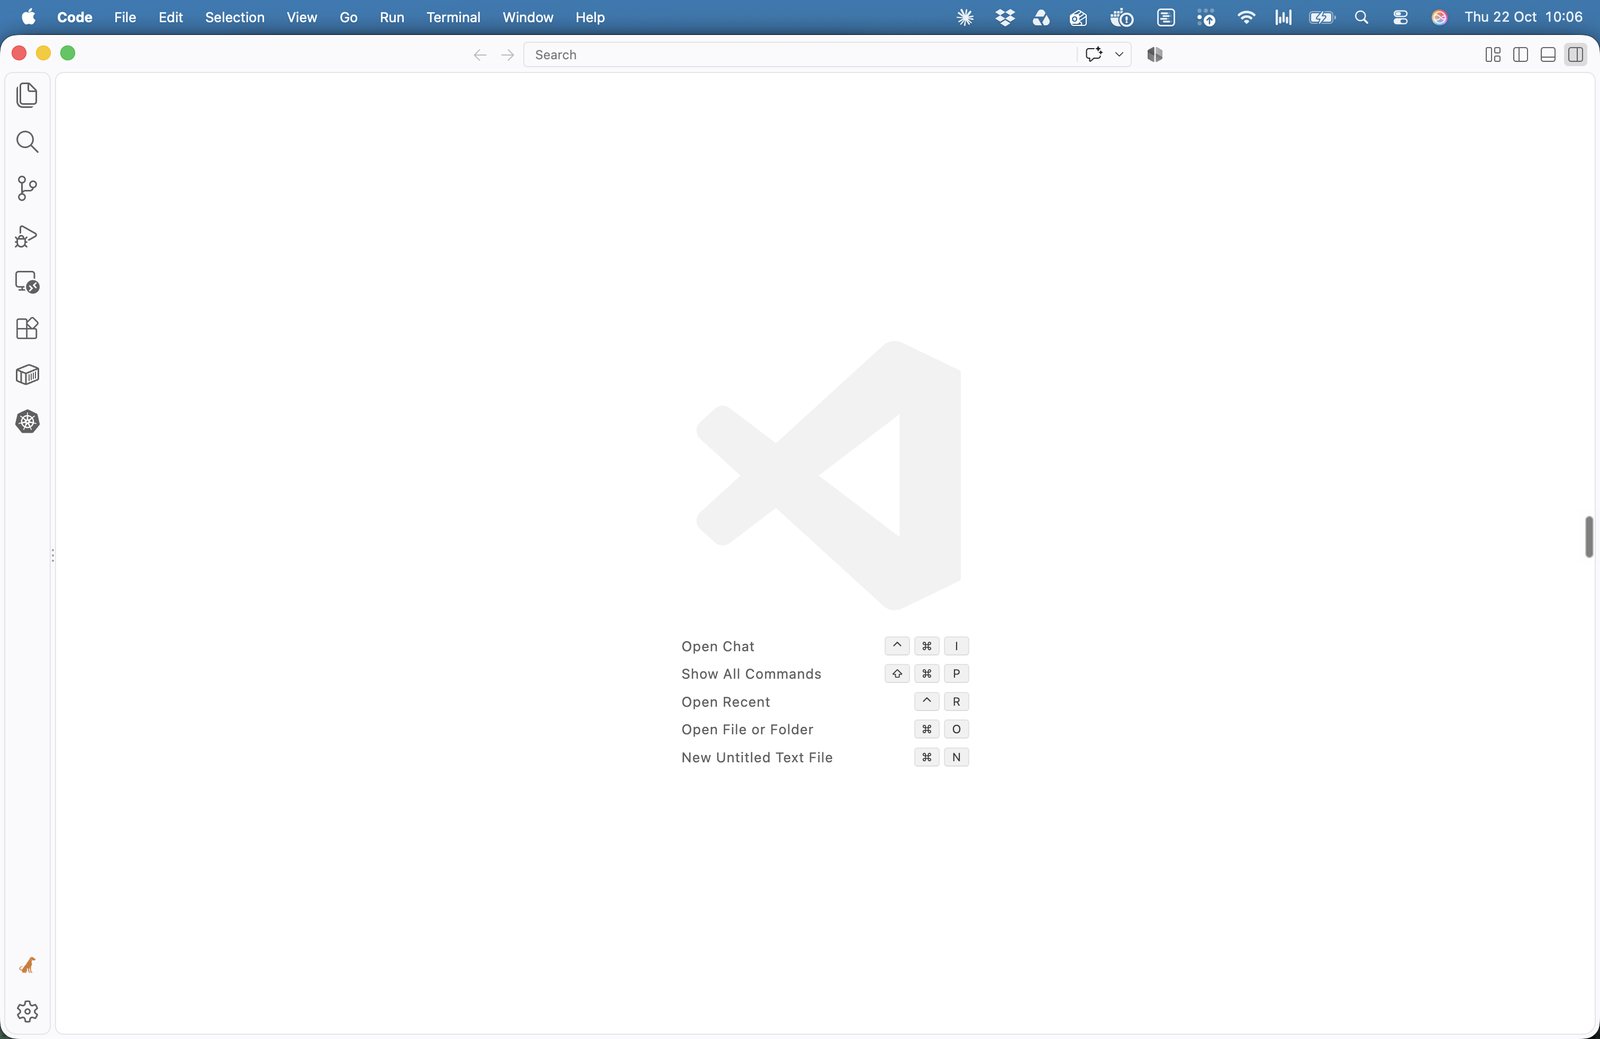
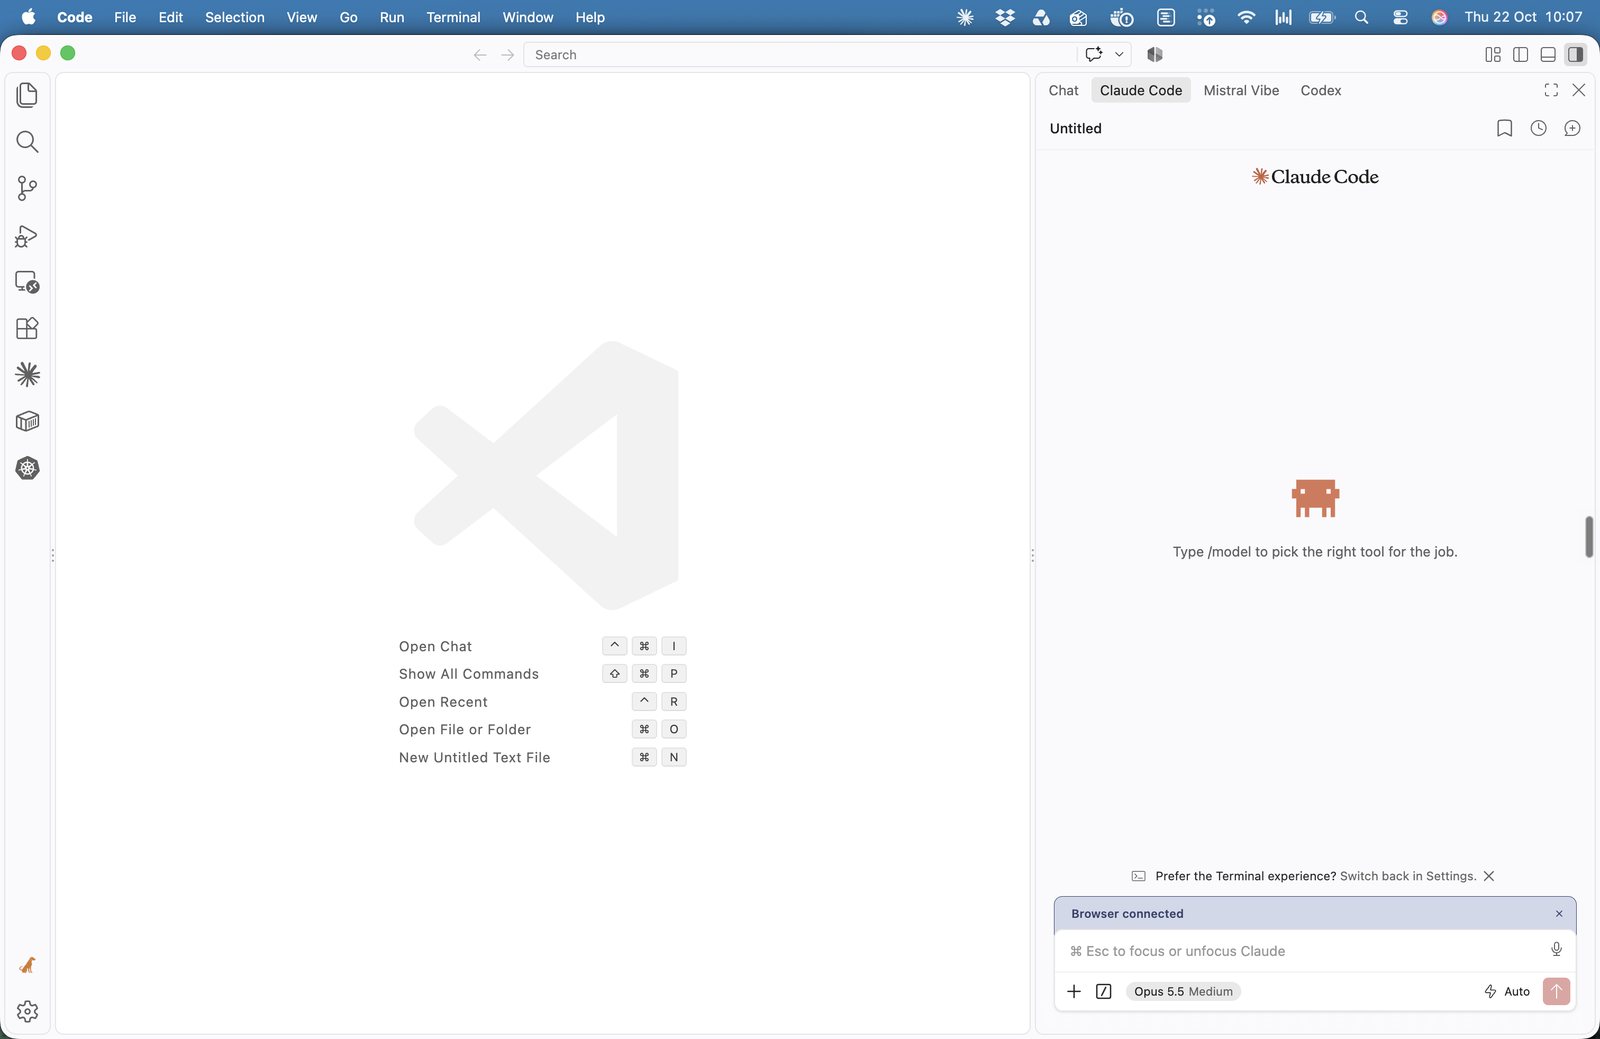
Open VS Code. You should see the empty window in Fig. 1.
Step 02
Find your way around the screen
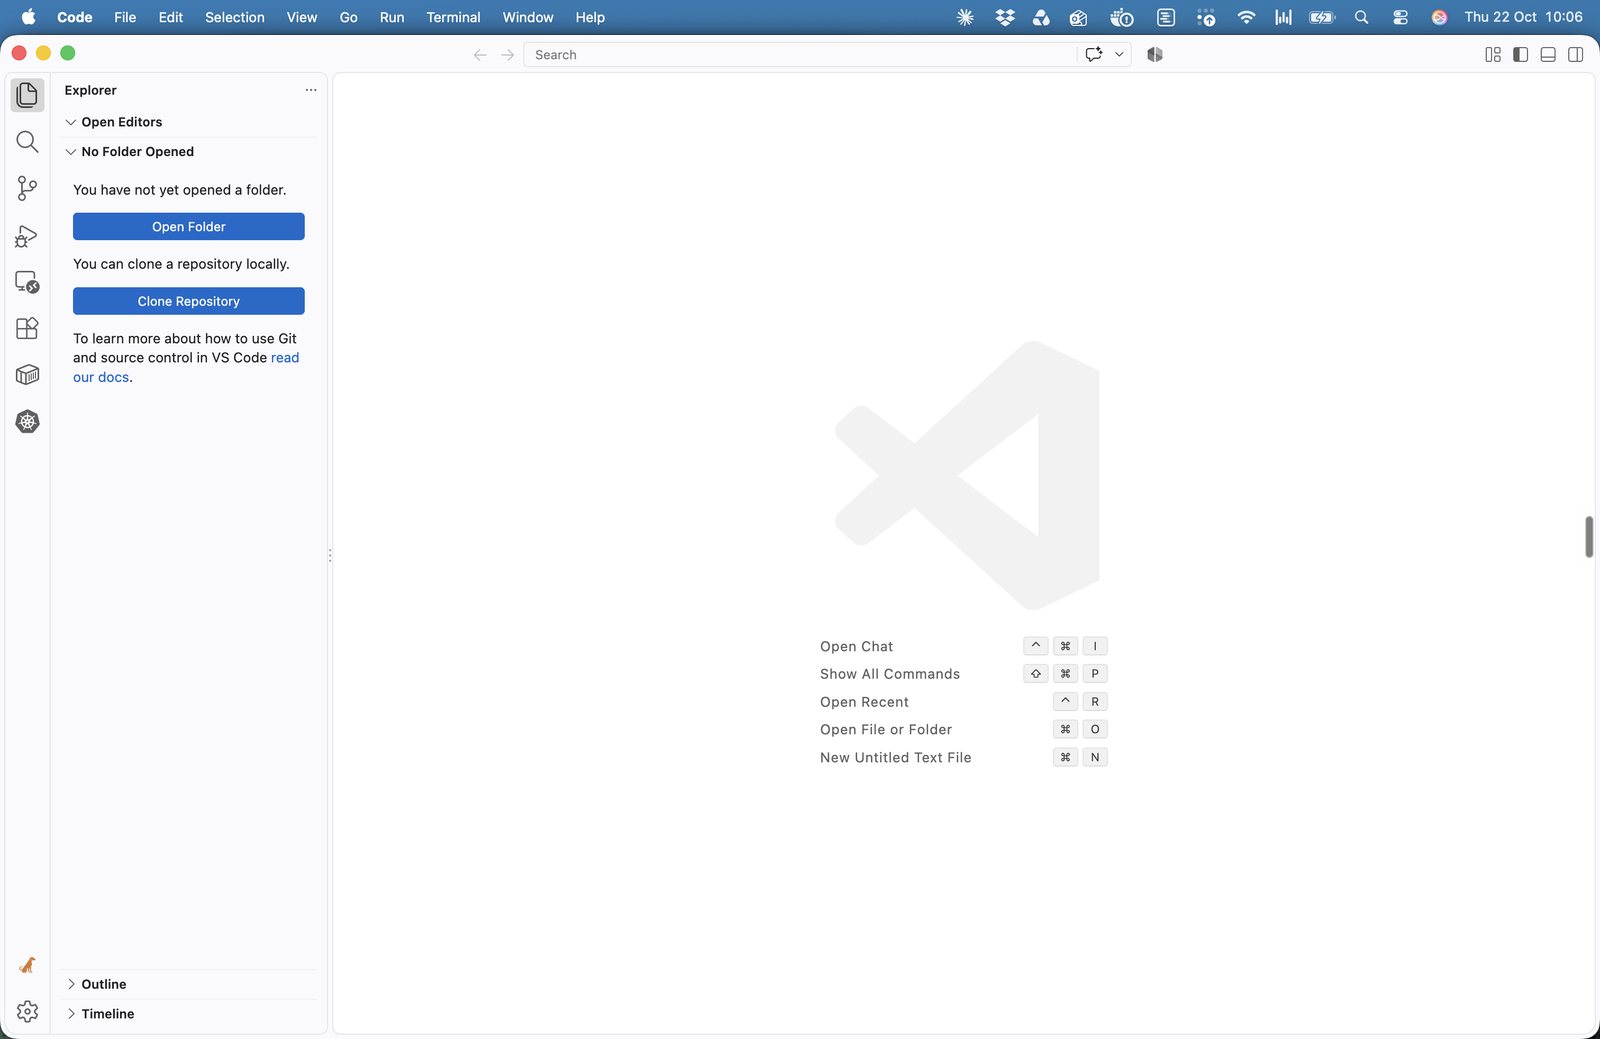
Three areas matter: the file navigator on the left, your files in the middle, and the AI panel on the right. Four buttons in the top-right corner show and hide them.
1The layout buttons, left to right: customise layout, left side bar (files), bottom panel (terminal), right side bar (AI chat). Click one to show it; click again to hide it.
The left side bar holds the Explorer, your file navigator. Open a working folder before you start, so the agents know where to work.
1Explorer icon. Click to open the file navigator; click again to minimise it.
2Open Folder. Pick or create a working folder for the session.
3The left side bar button does the same as the Explorer icon. Shortcut ⌘B / Ctrl+B.
Use a practice folder. Create an empty folder such as Desktop/New for training. Keep real case files out of it until the team is comfortable with how the agents behave.
Step 03
Install the Claude and Mistral extensions
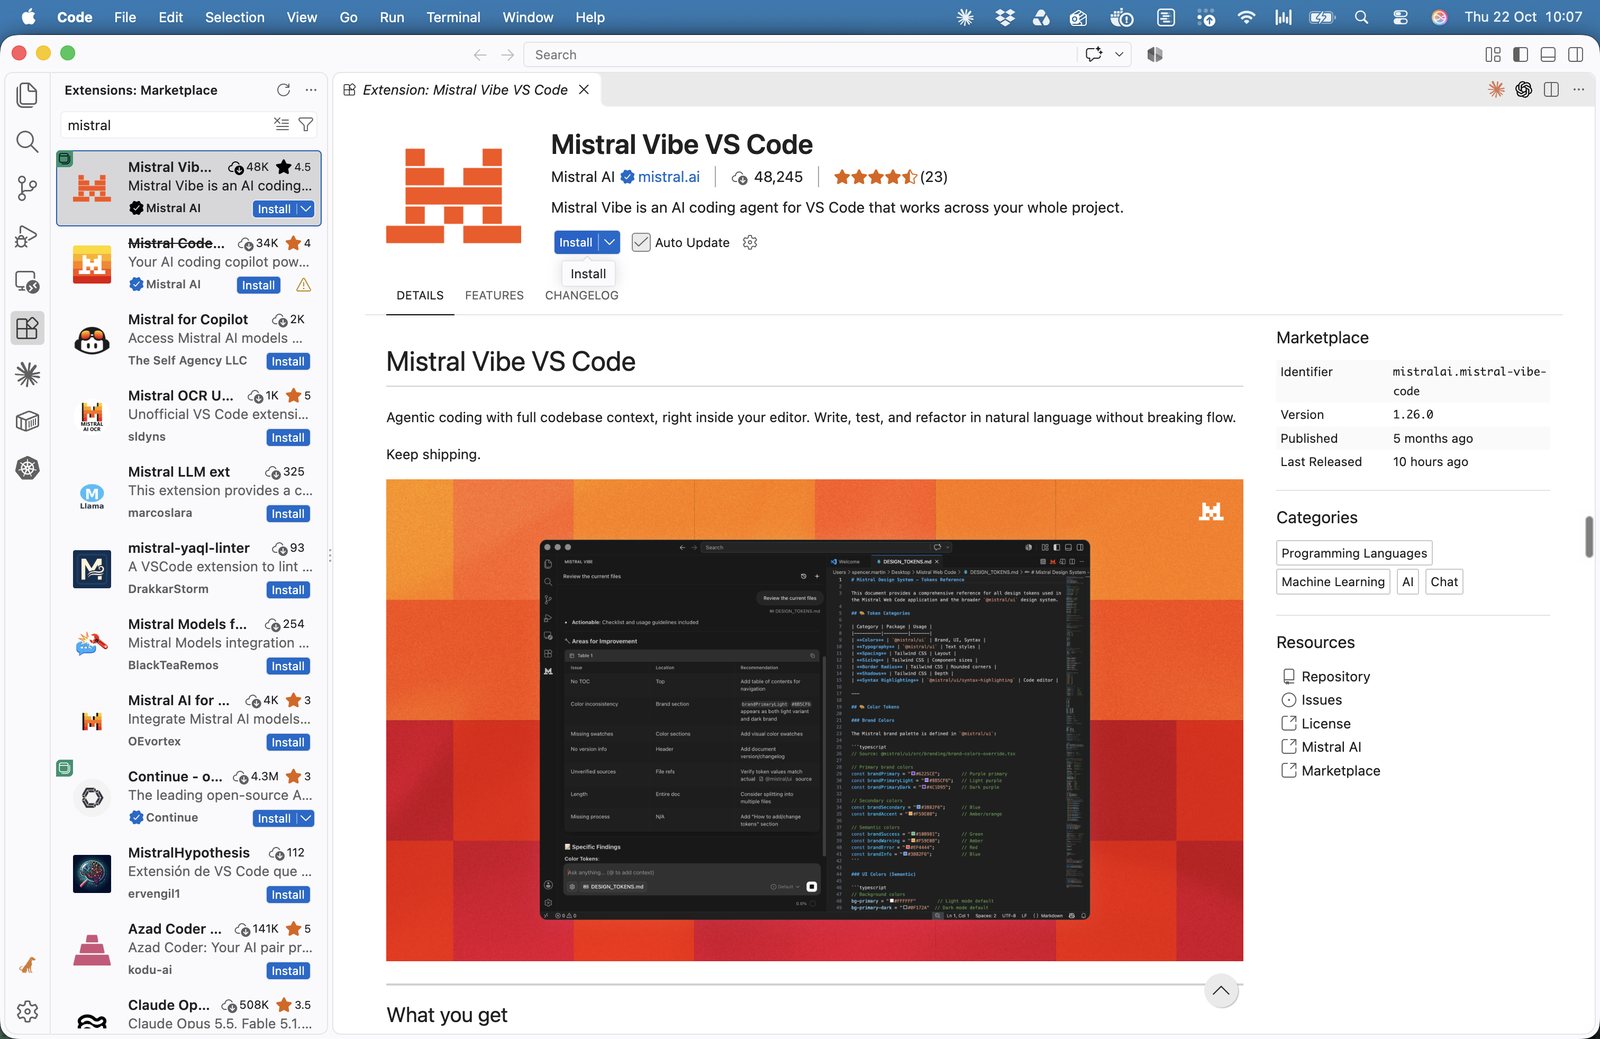
Both agents are free extensions. Many look-alikes exist, so check the publisher before you click Install.
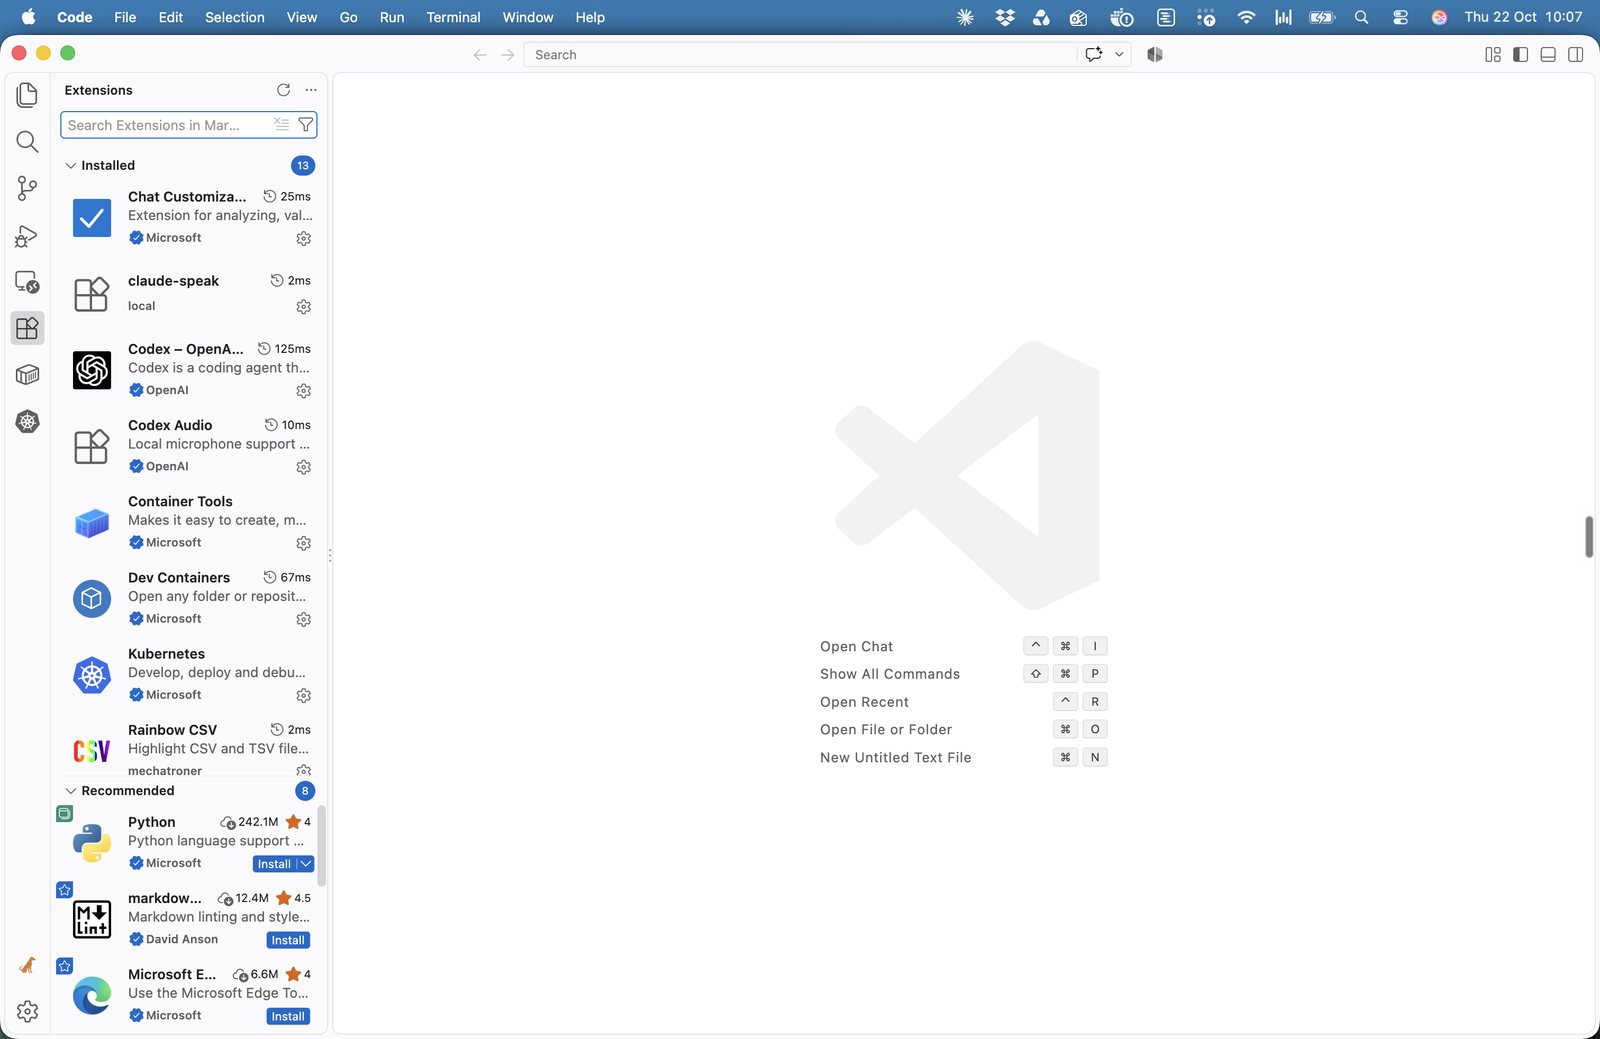
12Fig. 3 The Extensions view. Shortcut ⇧⌘X / Ctrl+Shift+X.
1Extensions icon in the left-hand bar.
2Search box. Type the extension name here.
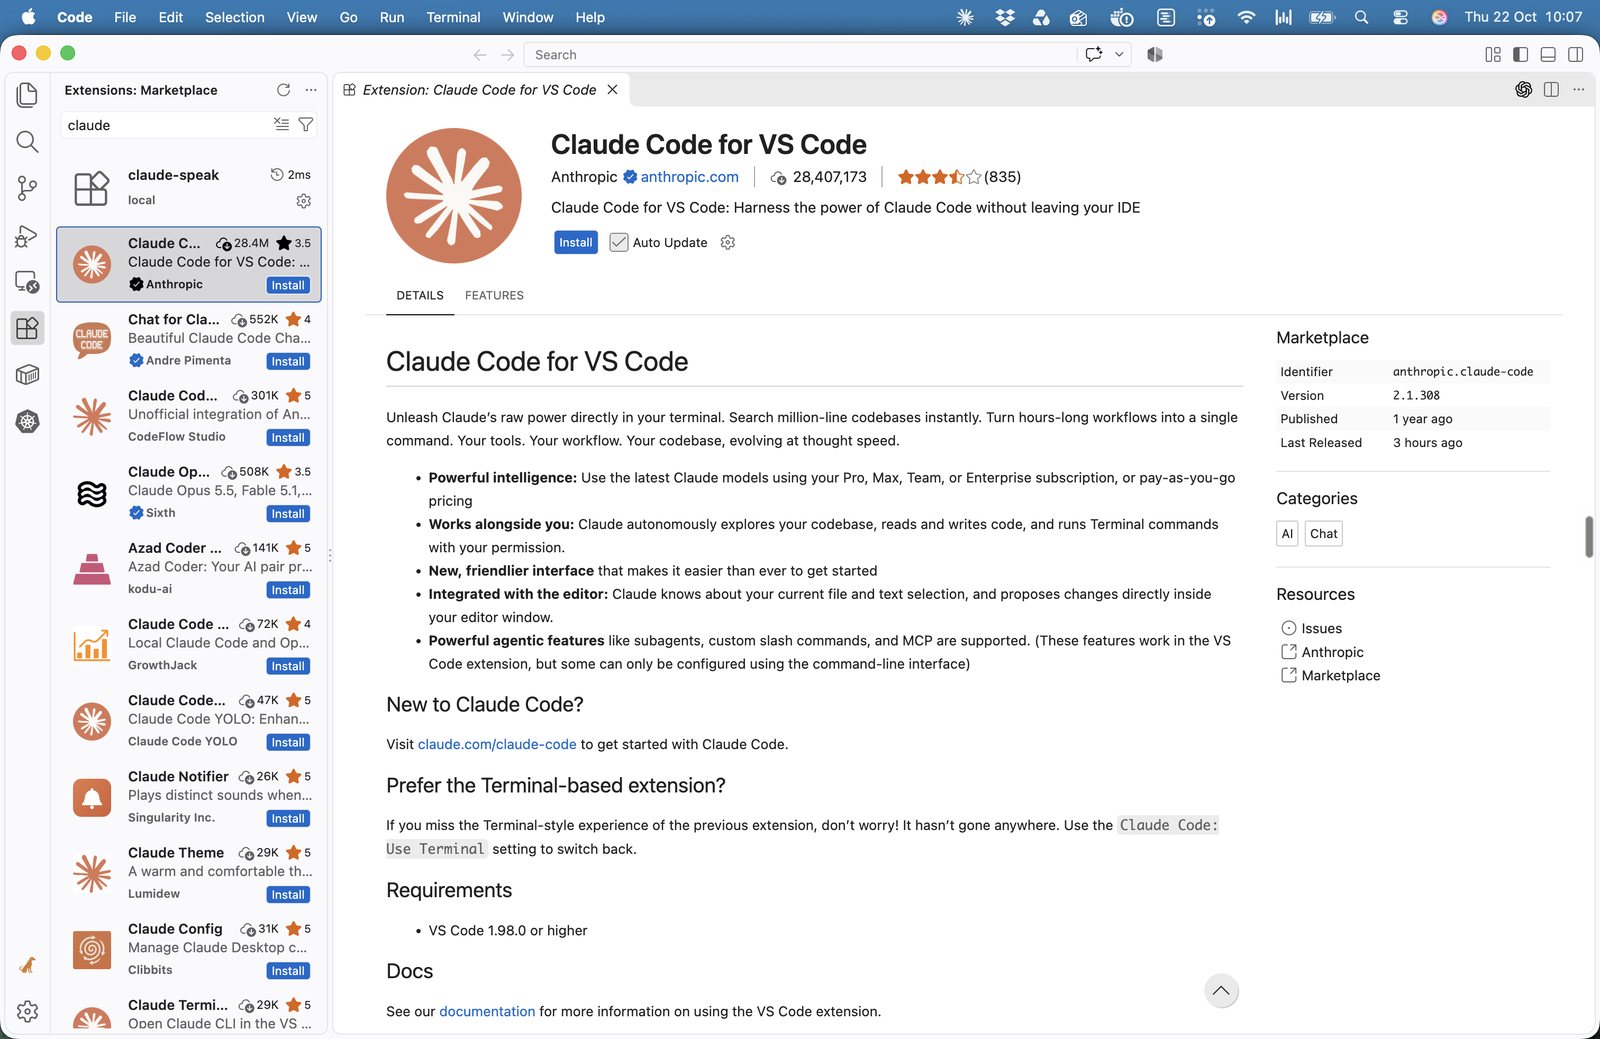
123Fig. 4 Search for claude and pick the official extension.
1Claude Code for VS Code, published by Anthropic with a verified tick. Click Install.
2Publisher: Anthropic, anthropic.com.
3Identifier: anthropic.claude-code. Anything else is not the official extension.
123Fig. 5 Search for mistral and pick Mistral Vibe.
1Mistral Vibe VS Code, published by Mistral AI. Click Install.
2Mistral Code is the older extension, shown struck through. Skip it.
3Identifier: mistralai.mistral-vibe-code.
Extension
Publisher
Identifier
Sign-in
Claude Code for VS Code
Anthropic
anthropic.claude-code
Paid Claude plan (Pro, Max, Team or Enterprise) or Claude Console account
Mistral Vibe VS Code
Mistral AI
mistralai.mistral-vibe-code
Mistral API key, pasted once during setup
Step 04
Open the AI panel on the right
Keep the agents in the right side bar. Files stay on the left and you can watch both at once.
First, trust the folder that holds your work
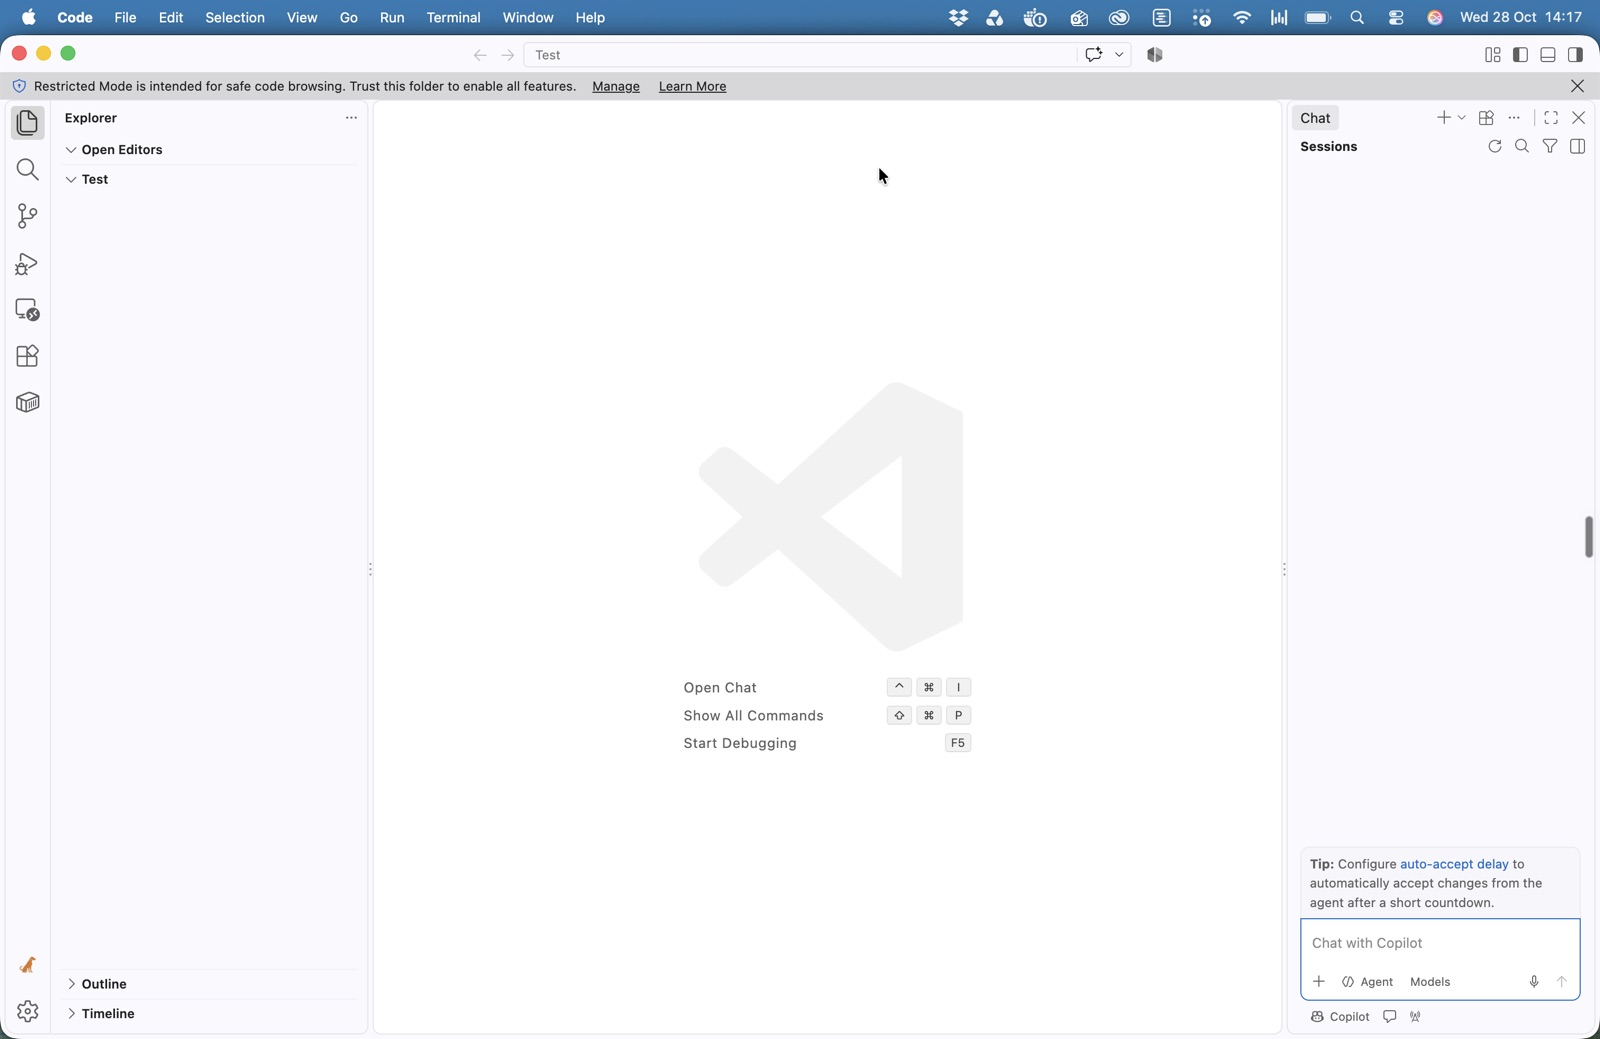
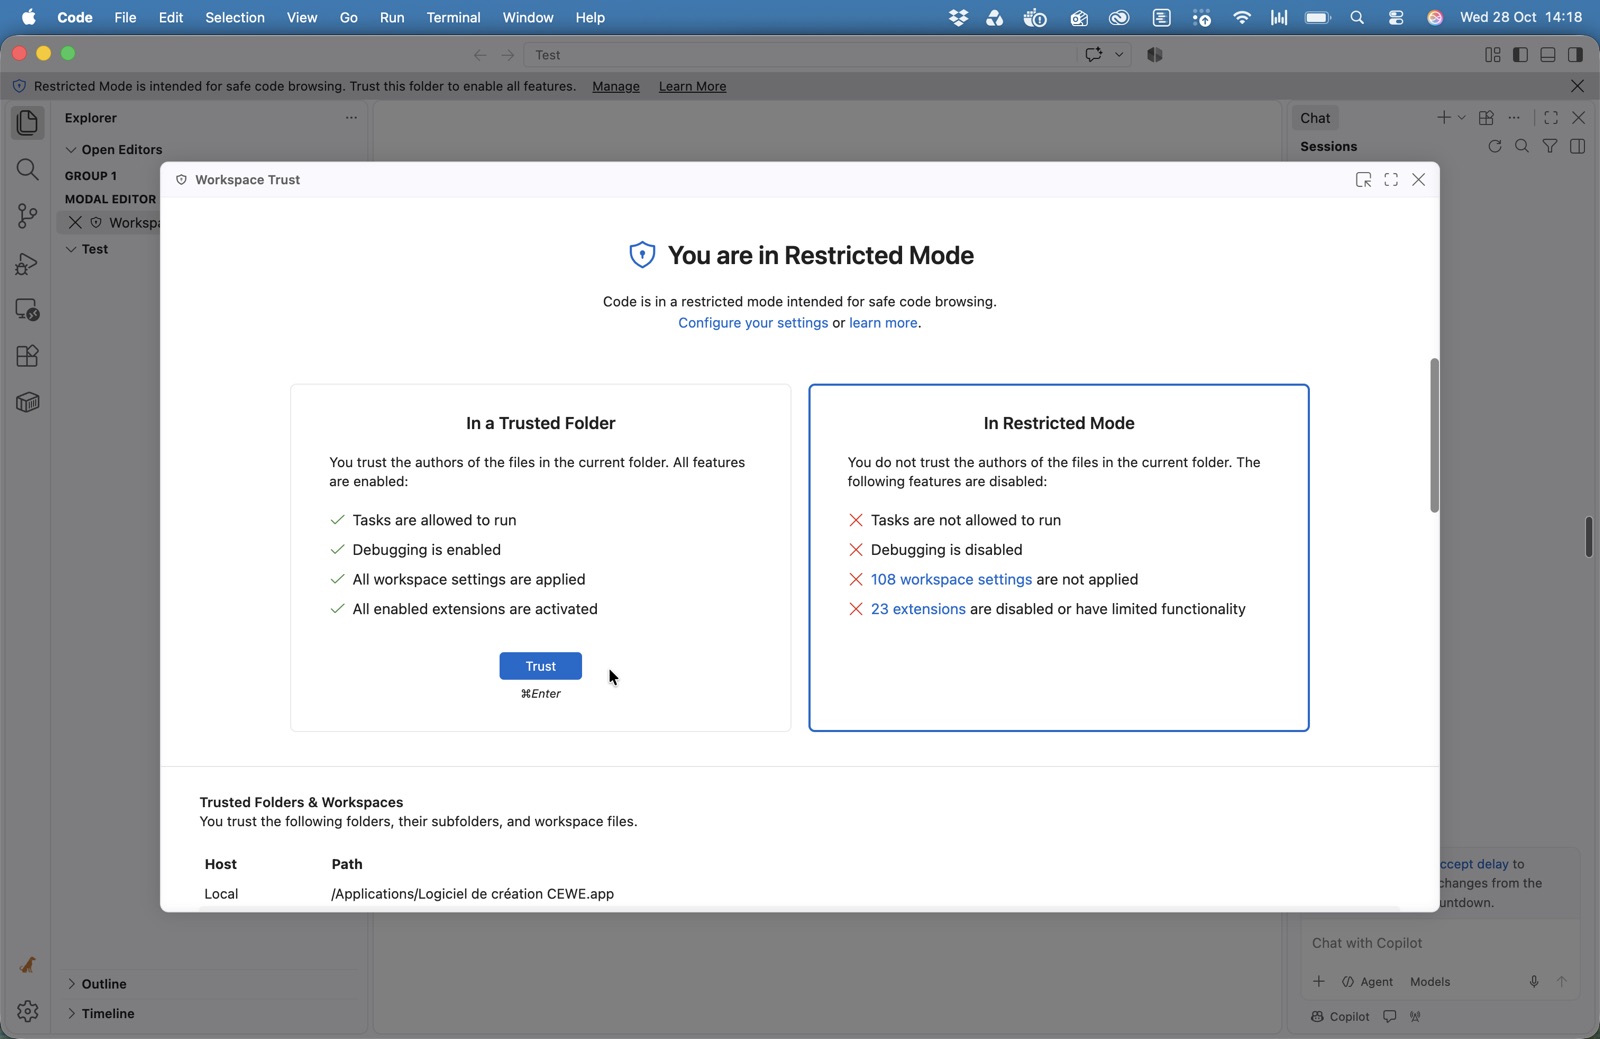
VS Code opens any folder it doesn't know in Restricted Mode, and in Restricted Mode your extensions are switched off, so Claude and Mistral won't show up. Trust works on the parent folder: trust the folder that holds all your working folders and every folder inside it is trusted too, so the agents are there each time you open a new window.
12Fig. 6 A folder opened in Restricted Mode. The right side bar only has the built-in Chat.
1The Restricted Mode banner. If you see it, your extensions are off in this window.
1What Restricted Mode costs you: here 23 extensions are off, the agents among them.
2Trust switches everything on for the folder you have open.
3Trusted Folders & Workspaces. Scroll down, click Add Folder and pick the parent folder, the one that holds all your working folders. Every folder inside it is then trusted too.
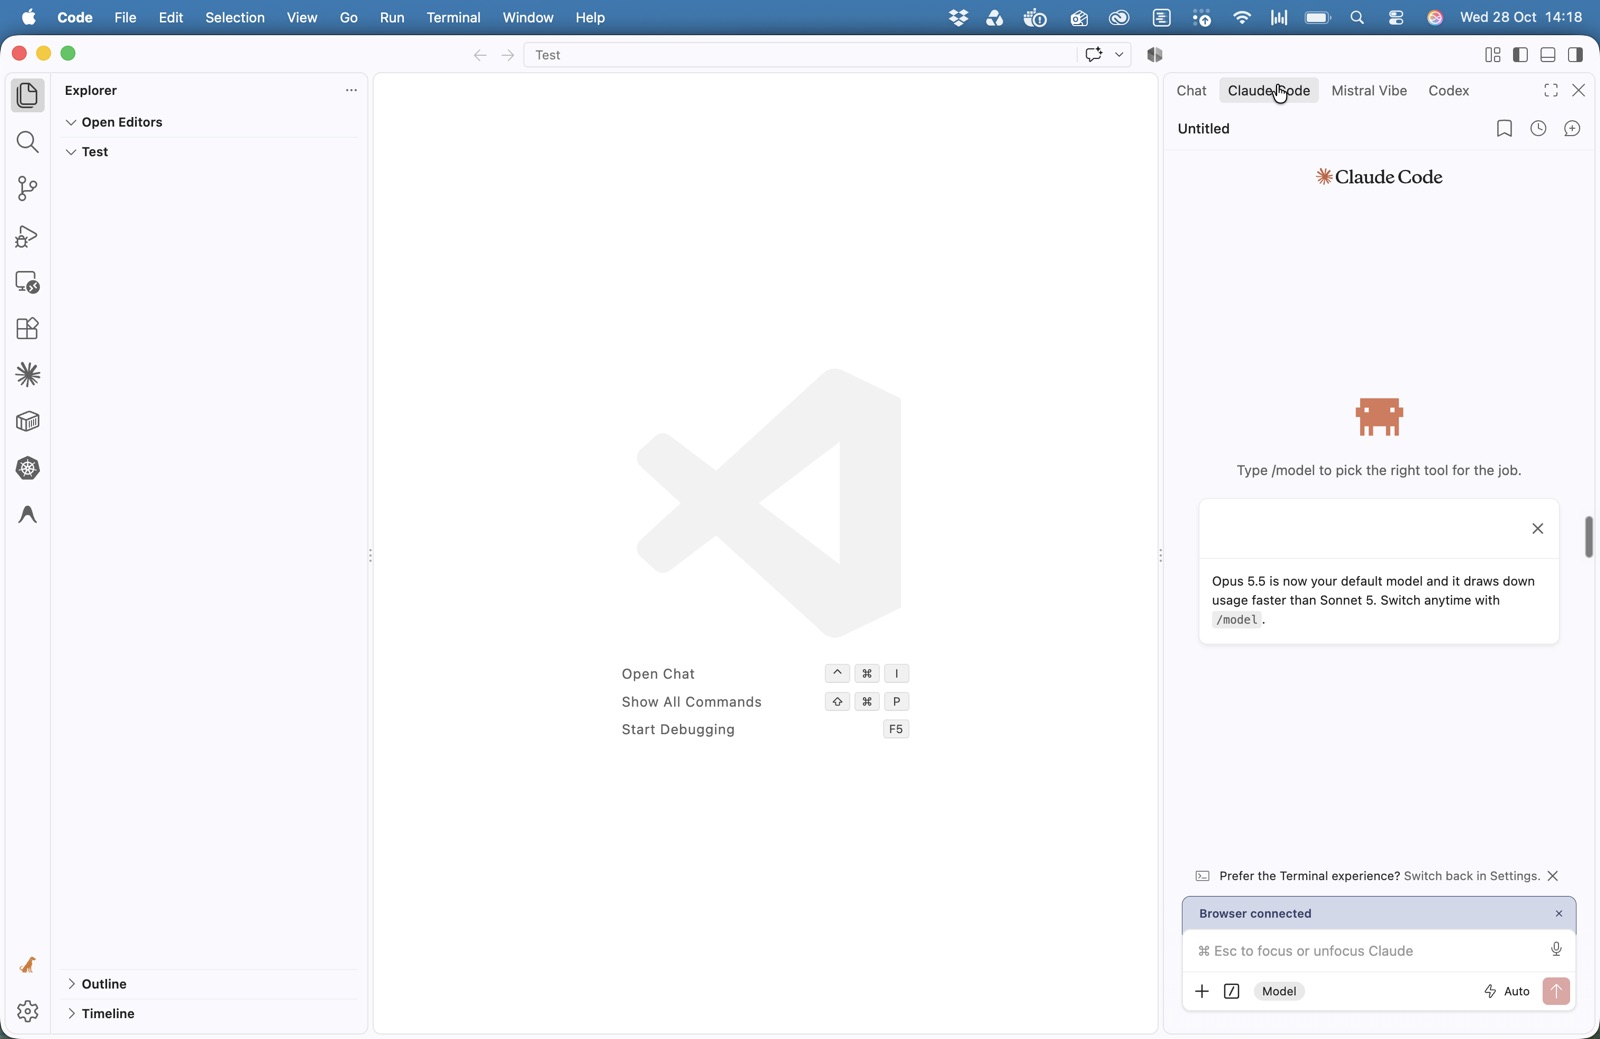
12Fig. 8 Trusted. The banner has gone and the agents are back.
1Claude Code and Mistral Vibe tabs in the right side bar.
2The extension icons are back in the left-hand bar too.
Pick the parent with care. Everything under a trusted folder can run tasks and extensions without asking. Trust the folder you keep your own work in, such as Desktop if your practice folder is Desktop/New. Don't trust Downloads or your whole home folder, because files from other people land there.
Open the panel
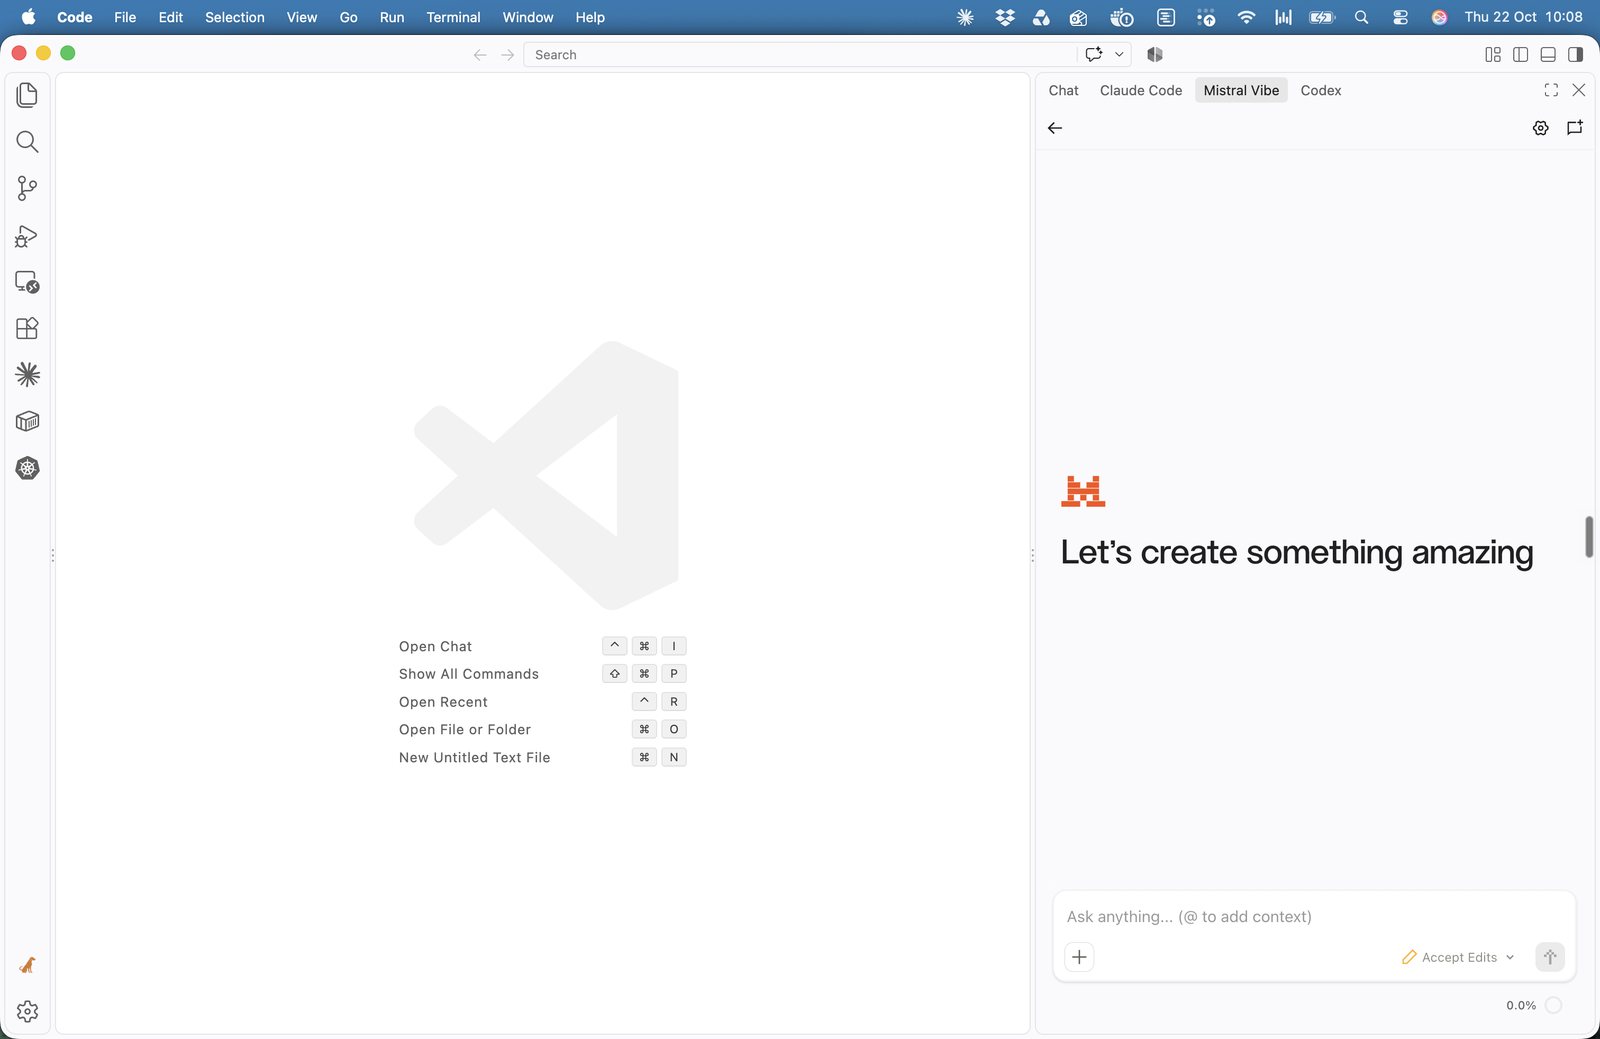
12Fig. 9 The right side bar with one tab per agent.
1Right side bar button. Click to open or minimise the AI panel. Shortcut ⌥⌘B / Ctrl+Alt+B.
2One tab per agent. Click Claude Code or Mistral Vibe to switch between them.
If an agent opens on the left or as a tab in the middle, drag its tab into the right side bar. VS Code remembers the position next time. The first time you open each agent, it asks you to sign in (Claude) or paste your API key (Mistral).
Sign in to Claude
You do this once. VS Code hands you over to your browser, you log in to your Claude account and approve the connection, then you come back to VS Code.
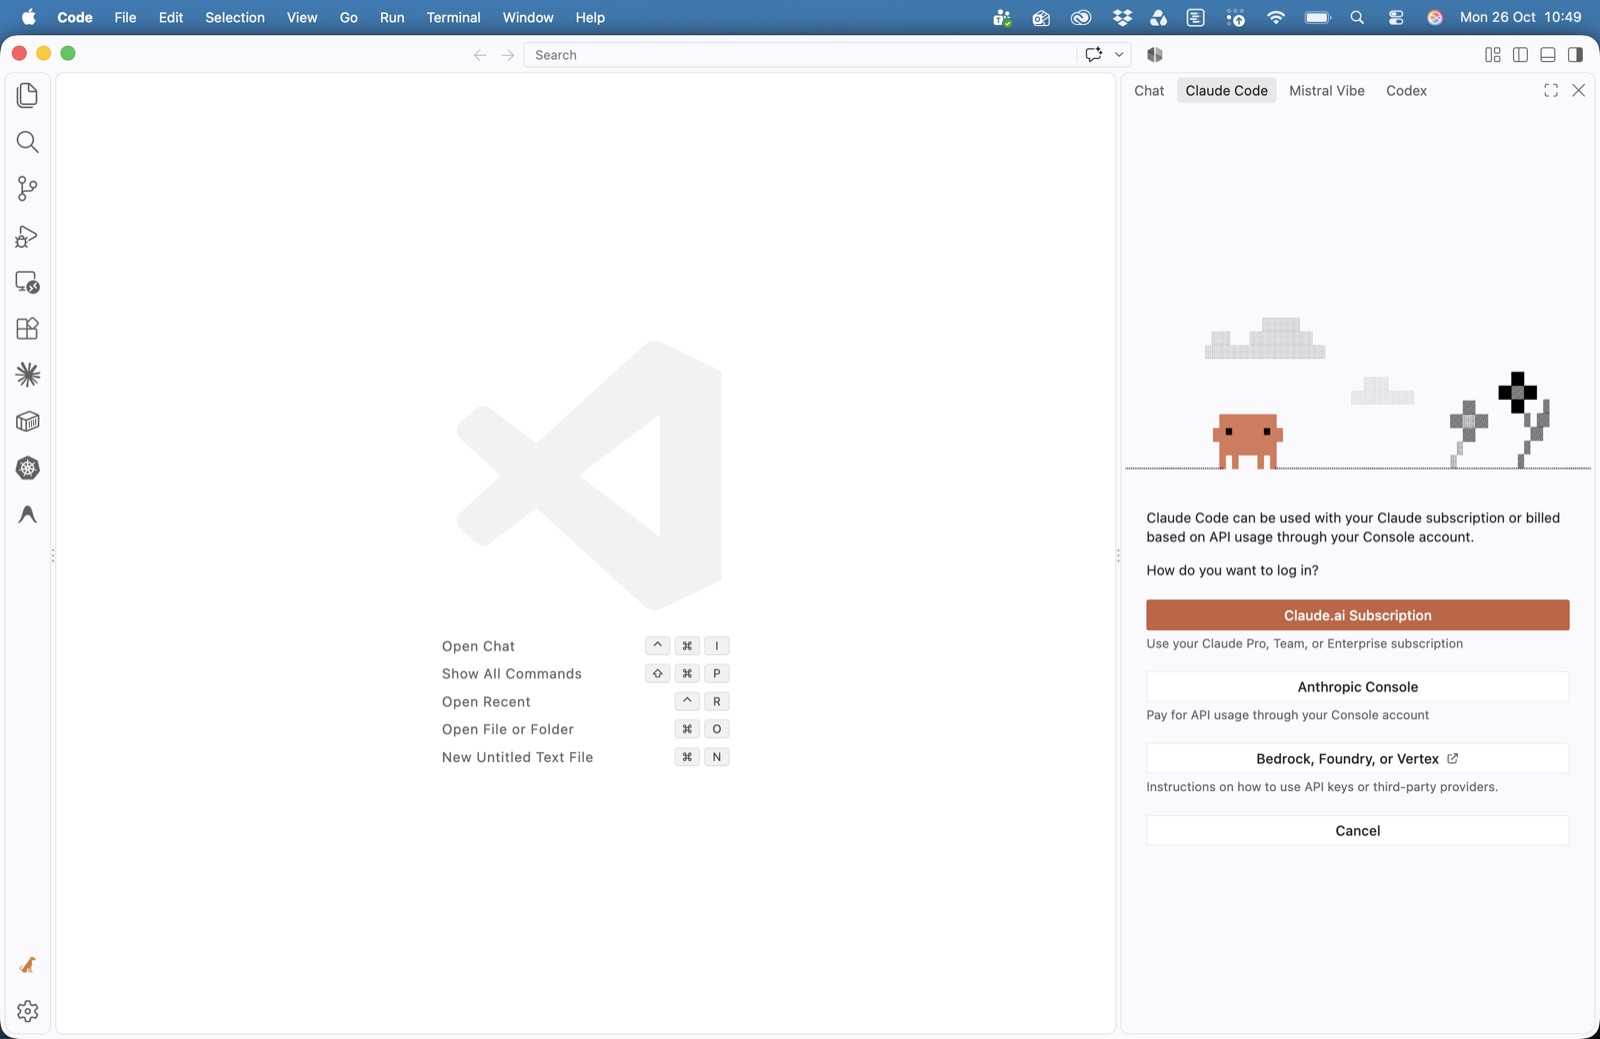
12Fig. 11 The first time you open the Claude Code tab.
1Claude.ai Subscription. Pick this if you have a Pro, Max, Team or Enterprise plan.
2Anthropic Console. Only if your organisation pays for Claude by API usage.
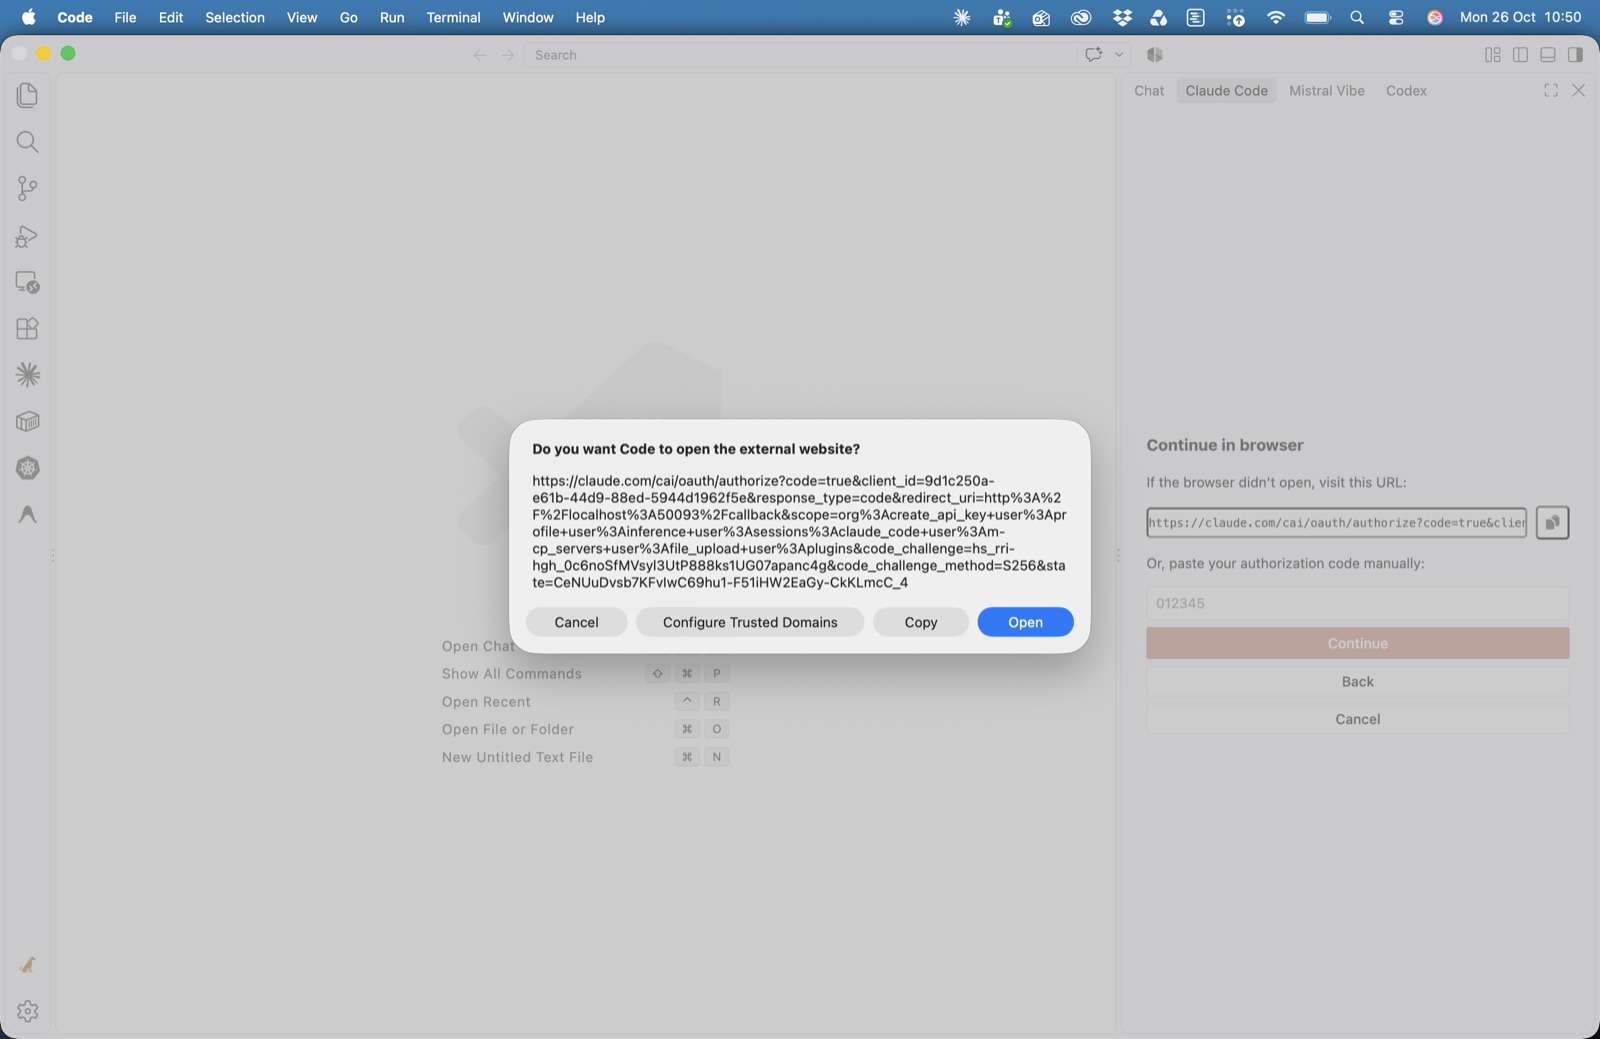
12Fig. 12 VS Code asks before it opens your browser.
1Click Open. The address starts with claude.com.
2If the browser doesn't open, copy the link from here into your browser. If the browser then shows you a code, paste it into the box below and click Continue.
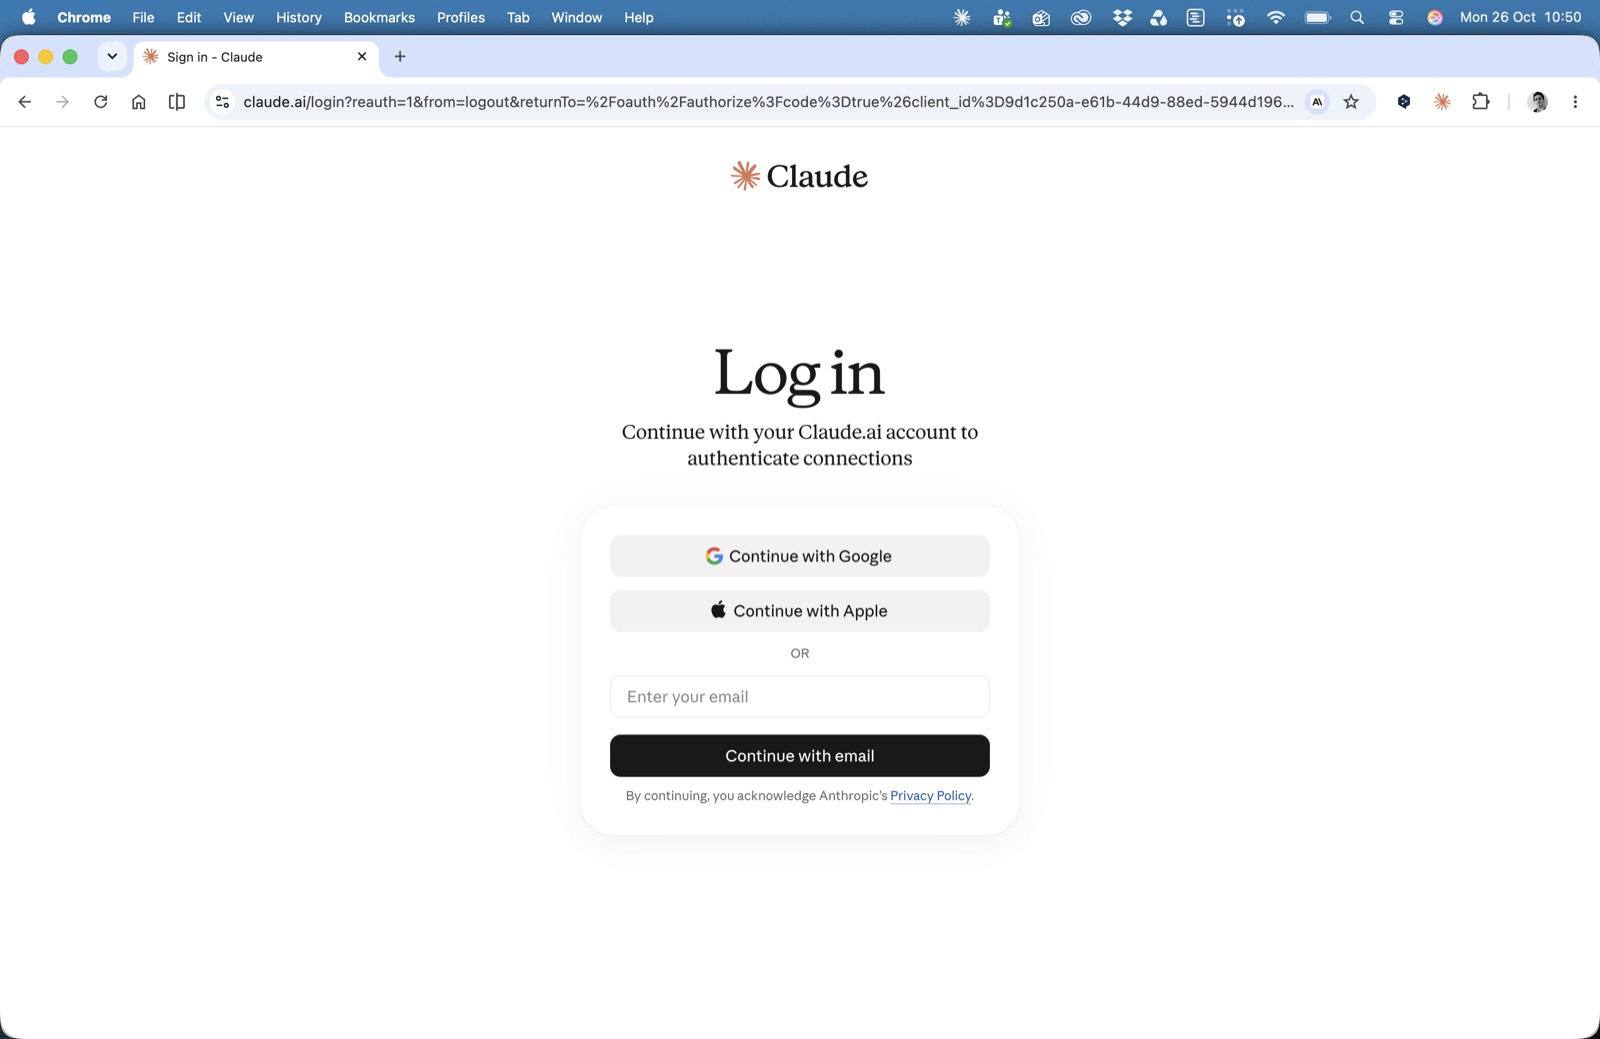
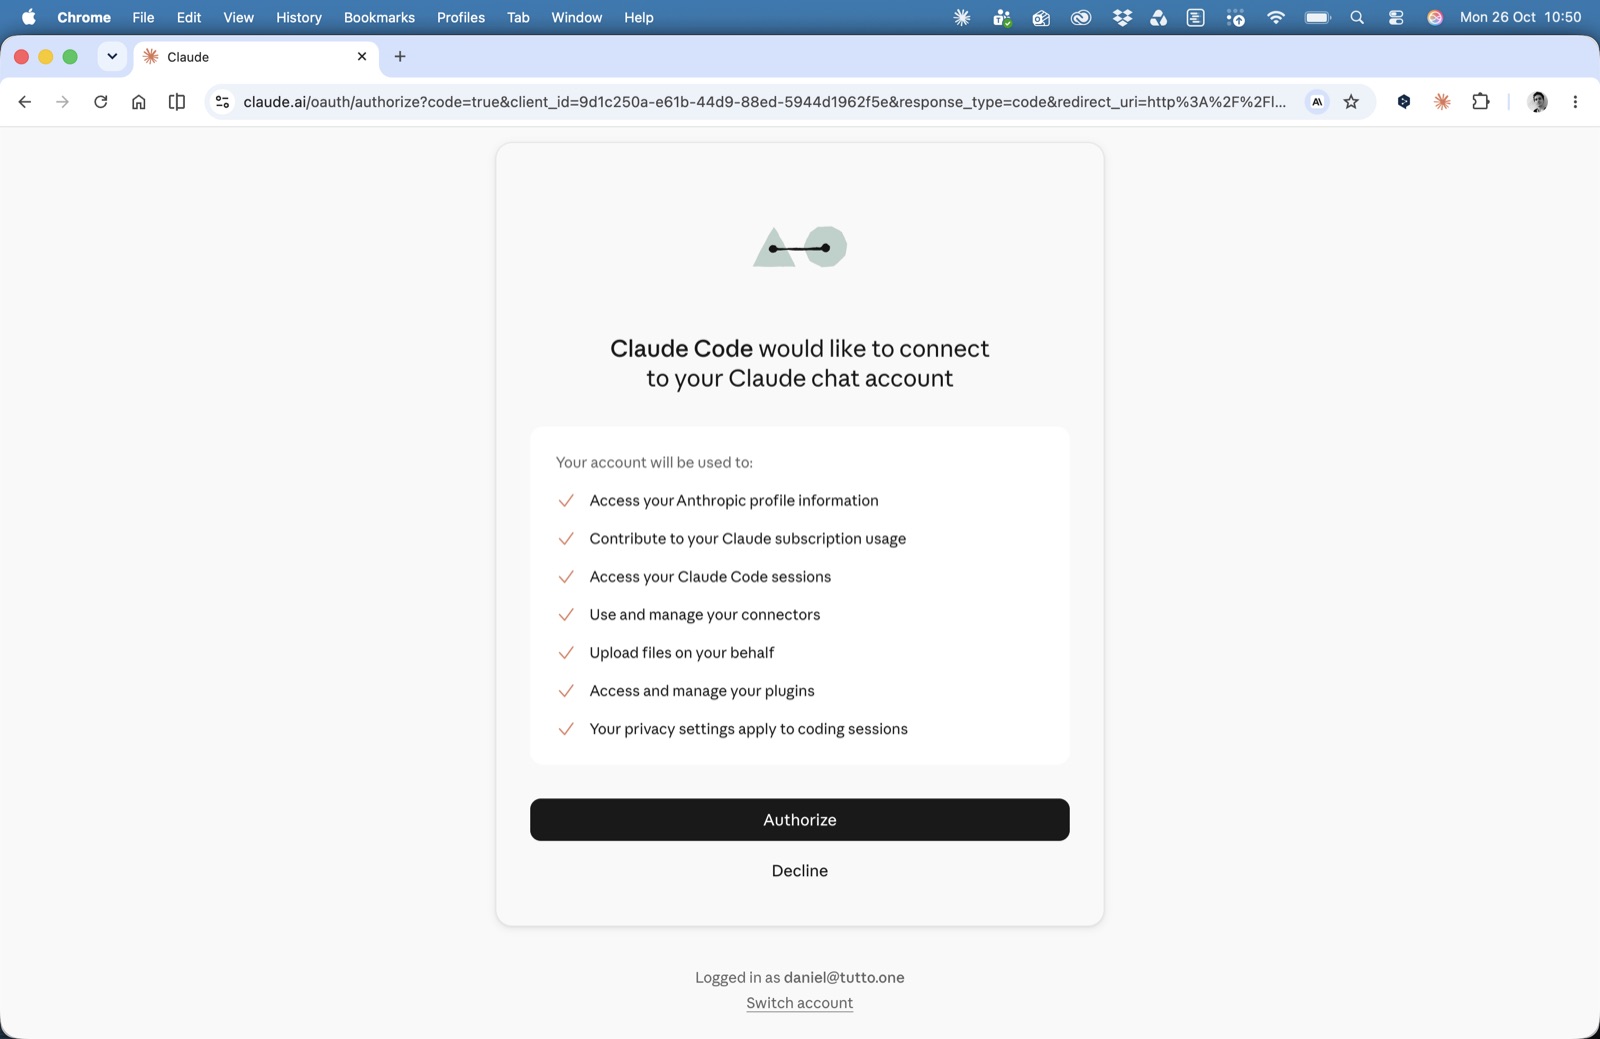
1Click Authorize. Claude Code then works from your plan, and your privacy settings apply to it too.
2Check the account shown here. Wrong one? Click Switch account.
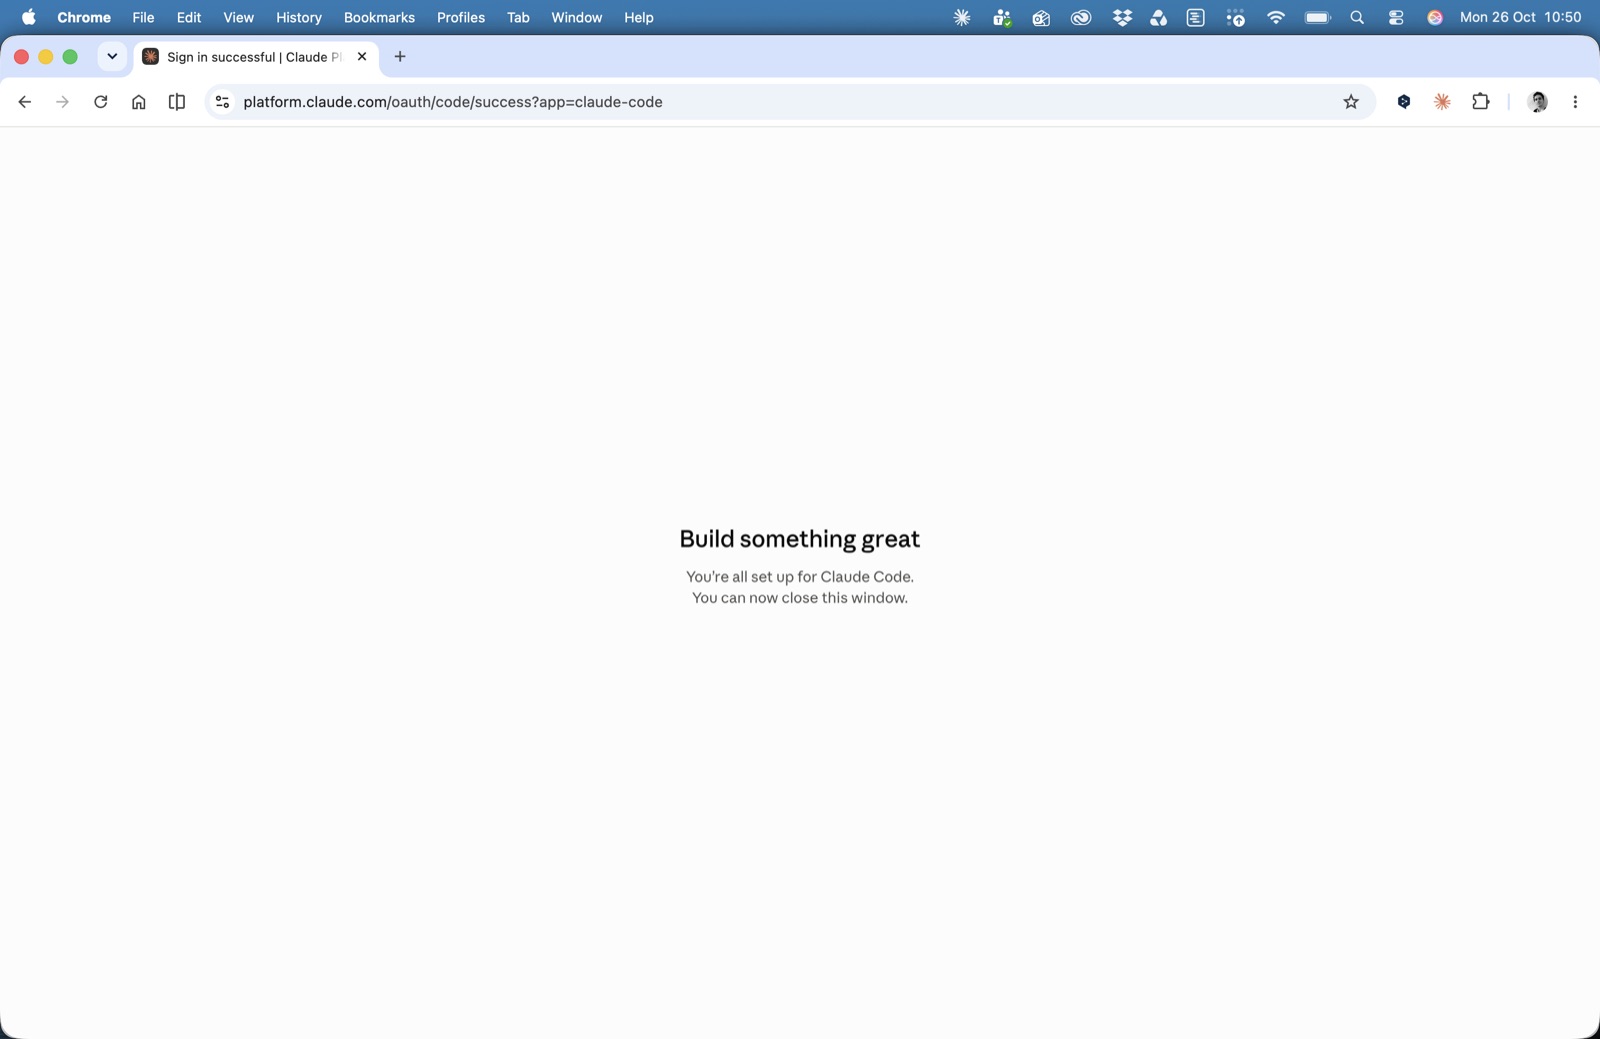
1Fig. 15 Done. Close the tab and go back to VS Code.
1This page means the sign-in worked. The Claude Code tab in VS Code is now ready for a prompt.
Step 05
Run a first task with Claude
Give Claude a task and watch the Explorer. New files appear on the left as Claude creates them.
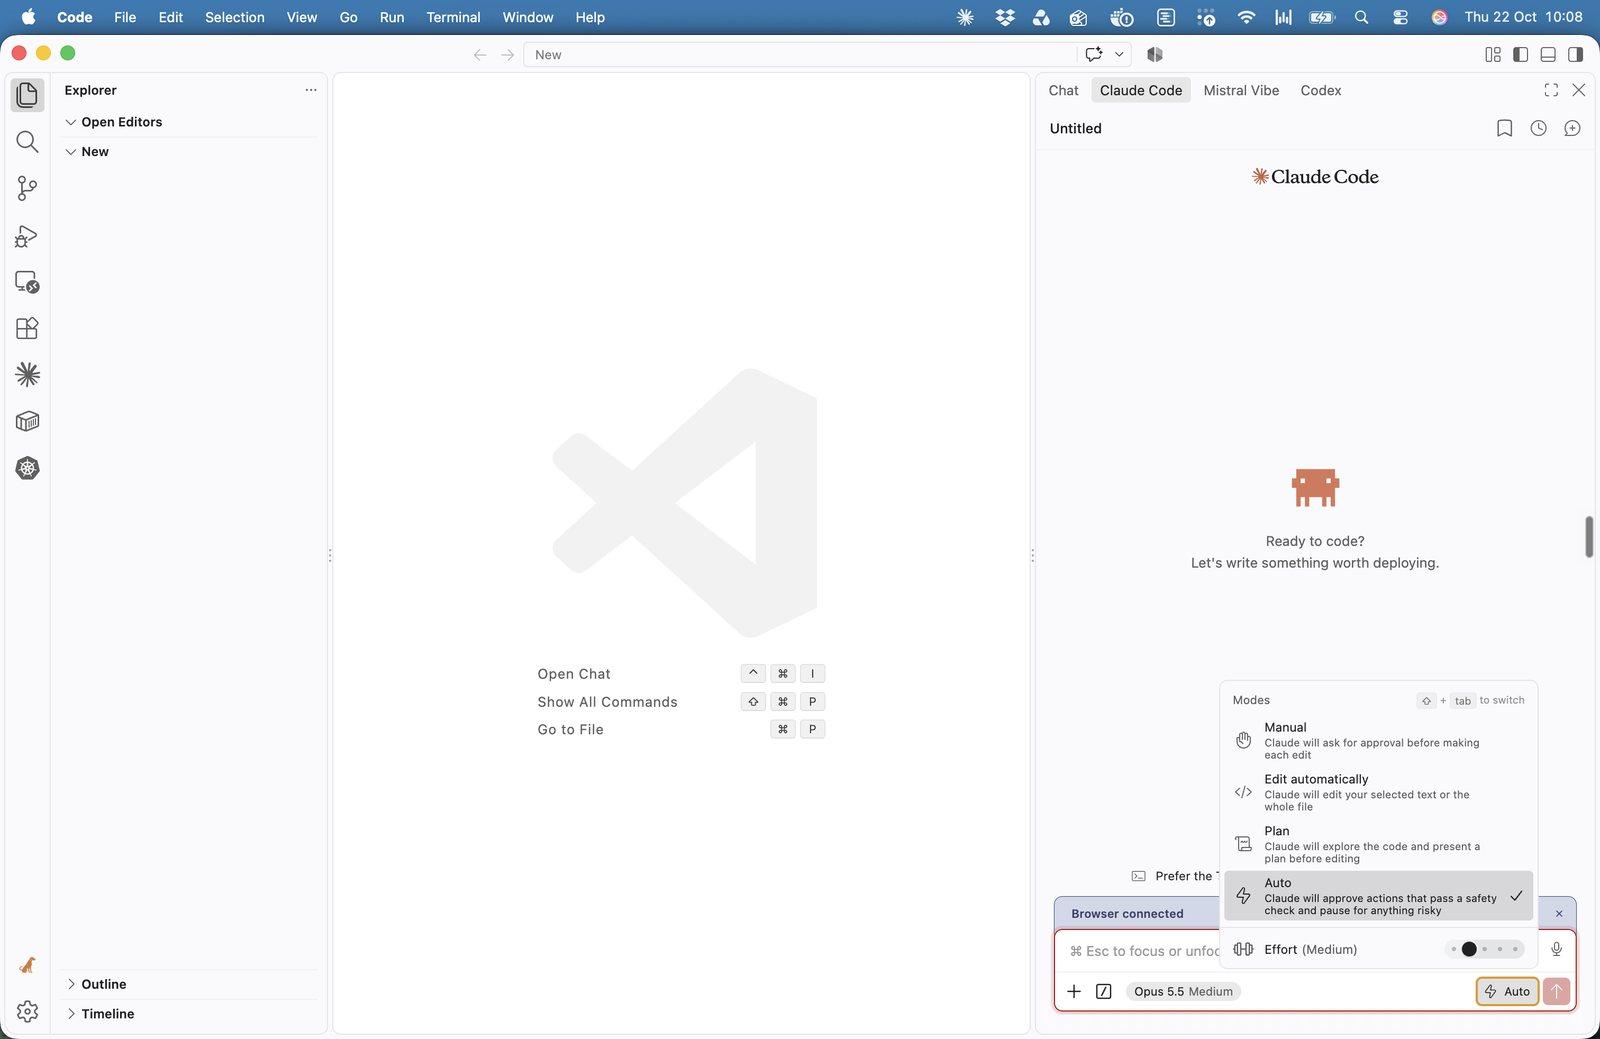
12Fig. 16 Before the task: an empty folder, and Claude's mode menu.
1The open folder, still empty.
2Modes. Manual asks before each edit; Plan explores first and shows a plan; Auto approves actions that pass a safety check. Switch with ⇧Tab.
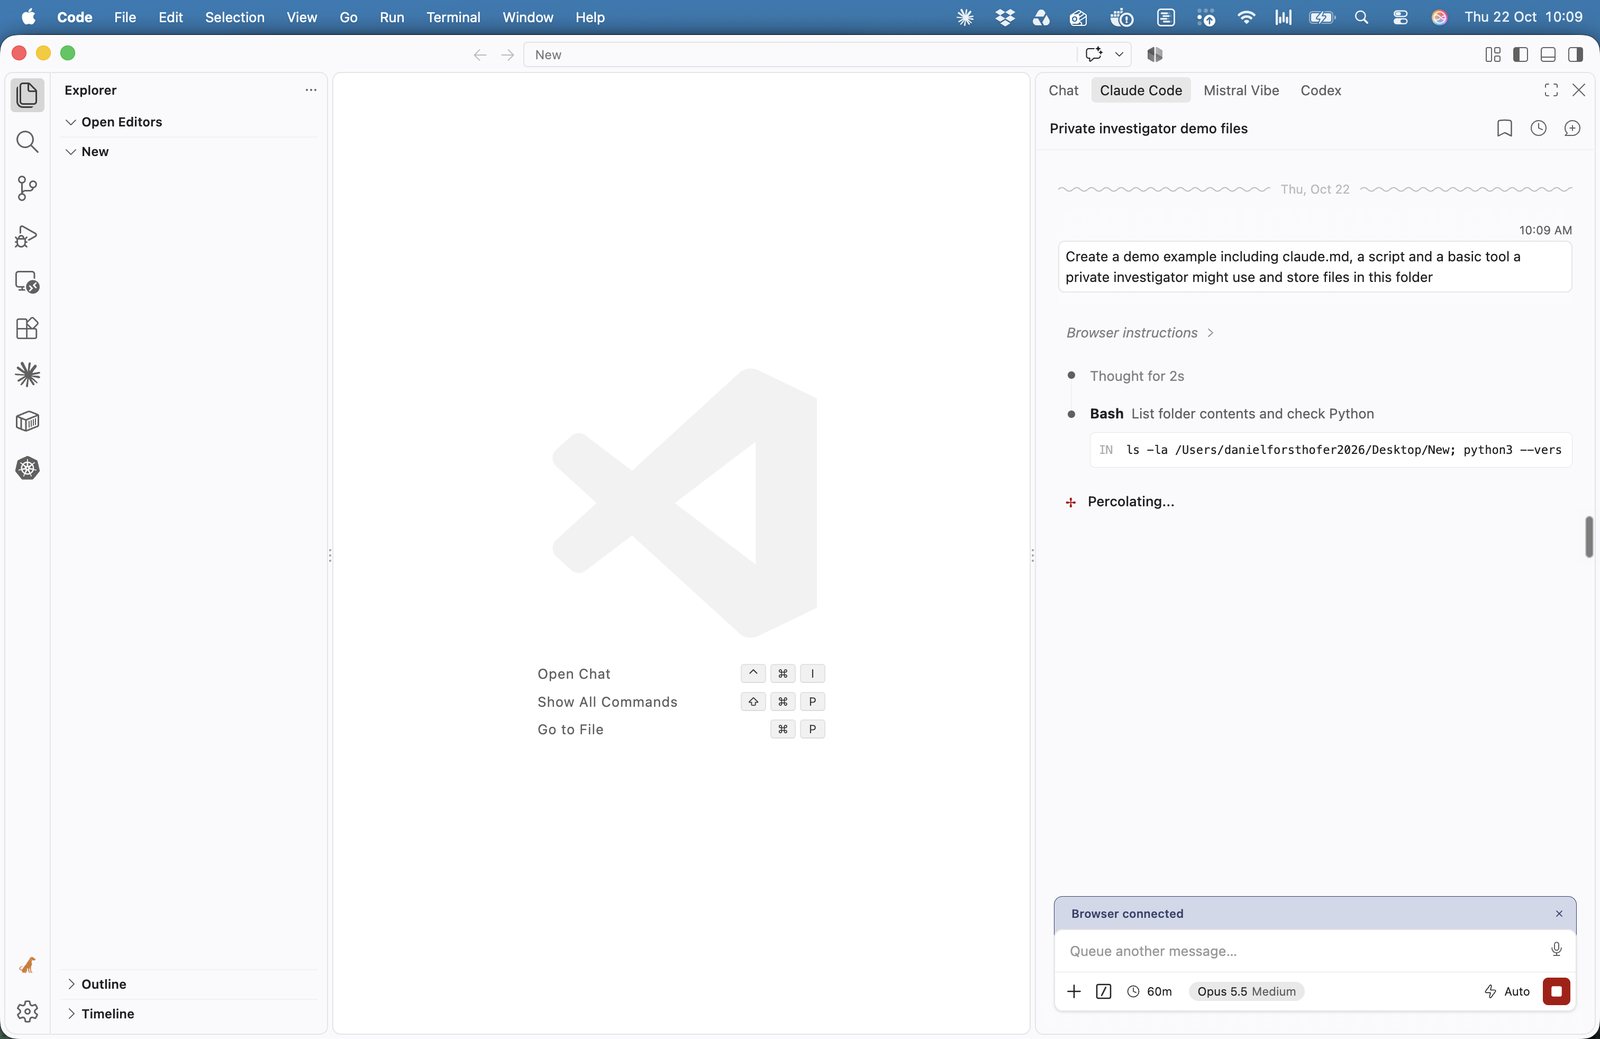
12Fig. 17 The prompt goes in. Claude starts checking the folder.
1The request: a demo kit with a CLAUDE.md, a script and a basic tool for an investigator.
2The Explorer is still empty while Claude plans.
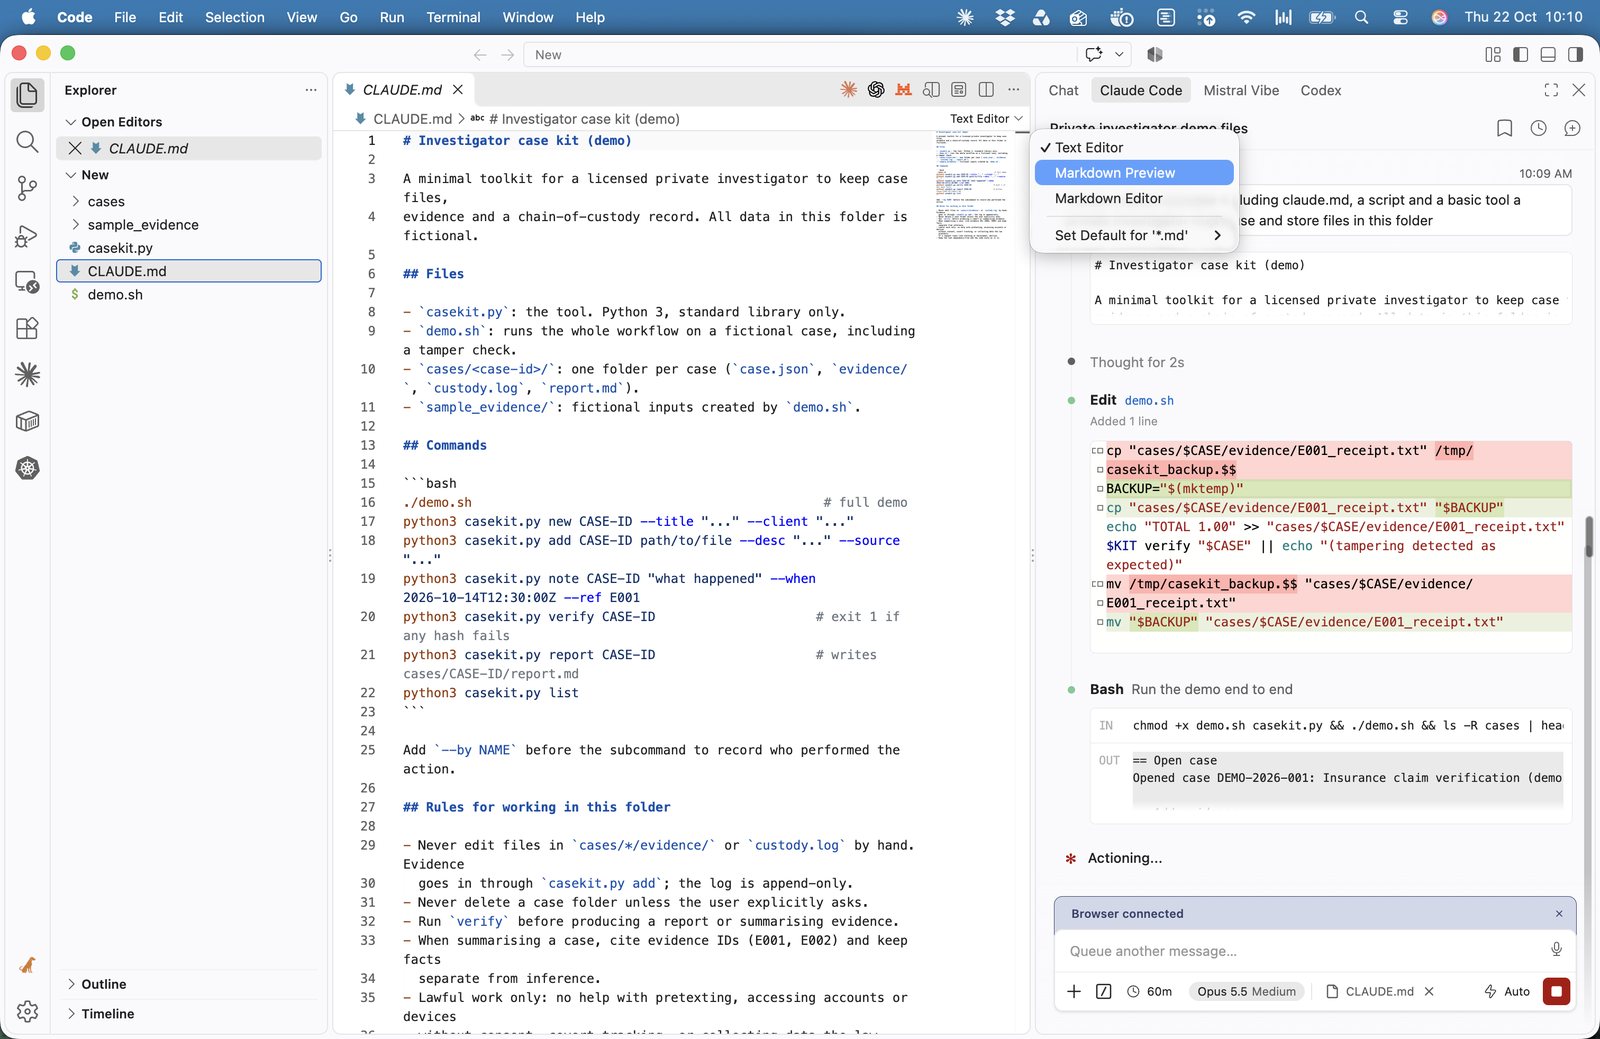
12Fig. 18 Seconds later the files appear in the navigator.
1New in the Explorer: cases, sample_evidence, casekit.py, CLAUDE.md and demo.sh. Click any file to open it.
2Markdown files open as raw text. Switch to Markdown Preview to read them formatted.
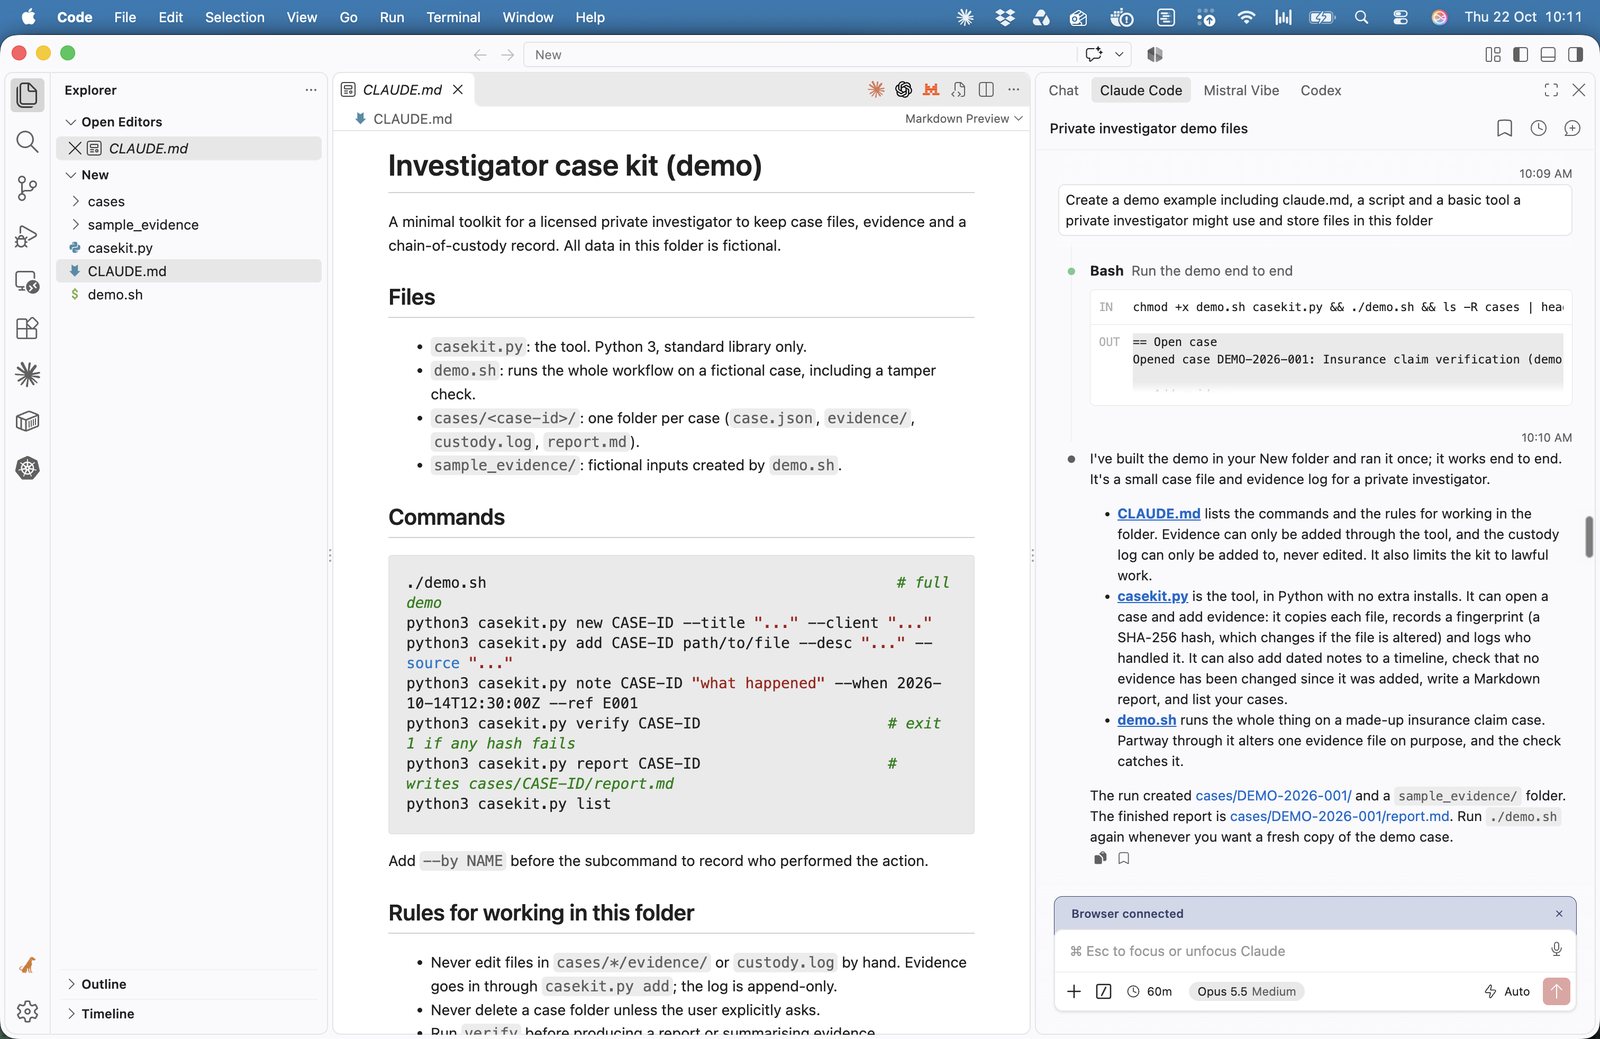
1Fig. 19 CLAUDE.md formatted, and Claude's summary of what it built.
1Claude reports what it made, what each file does and that it ran the demo end to end.
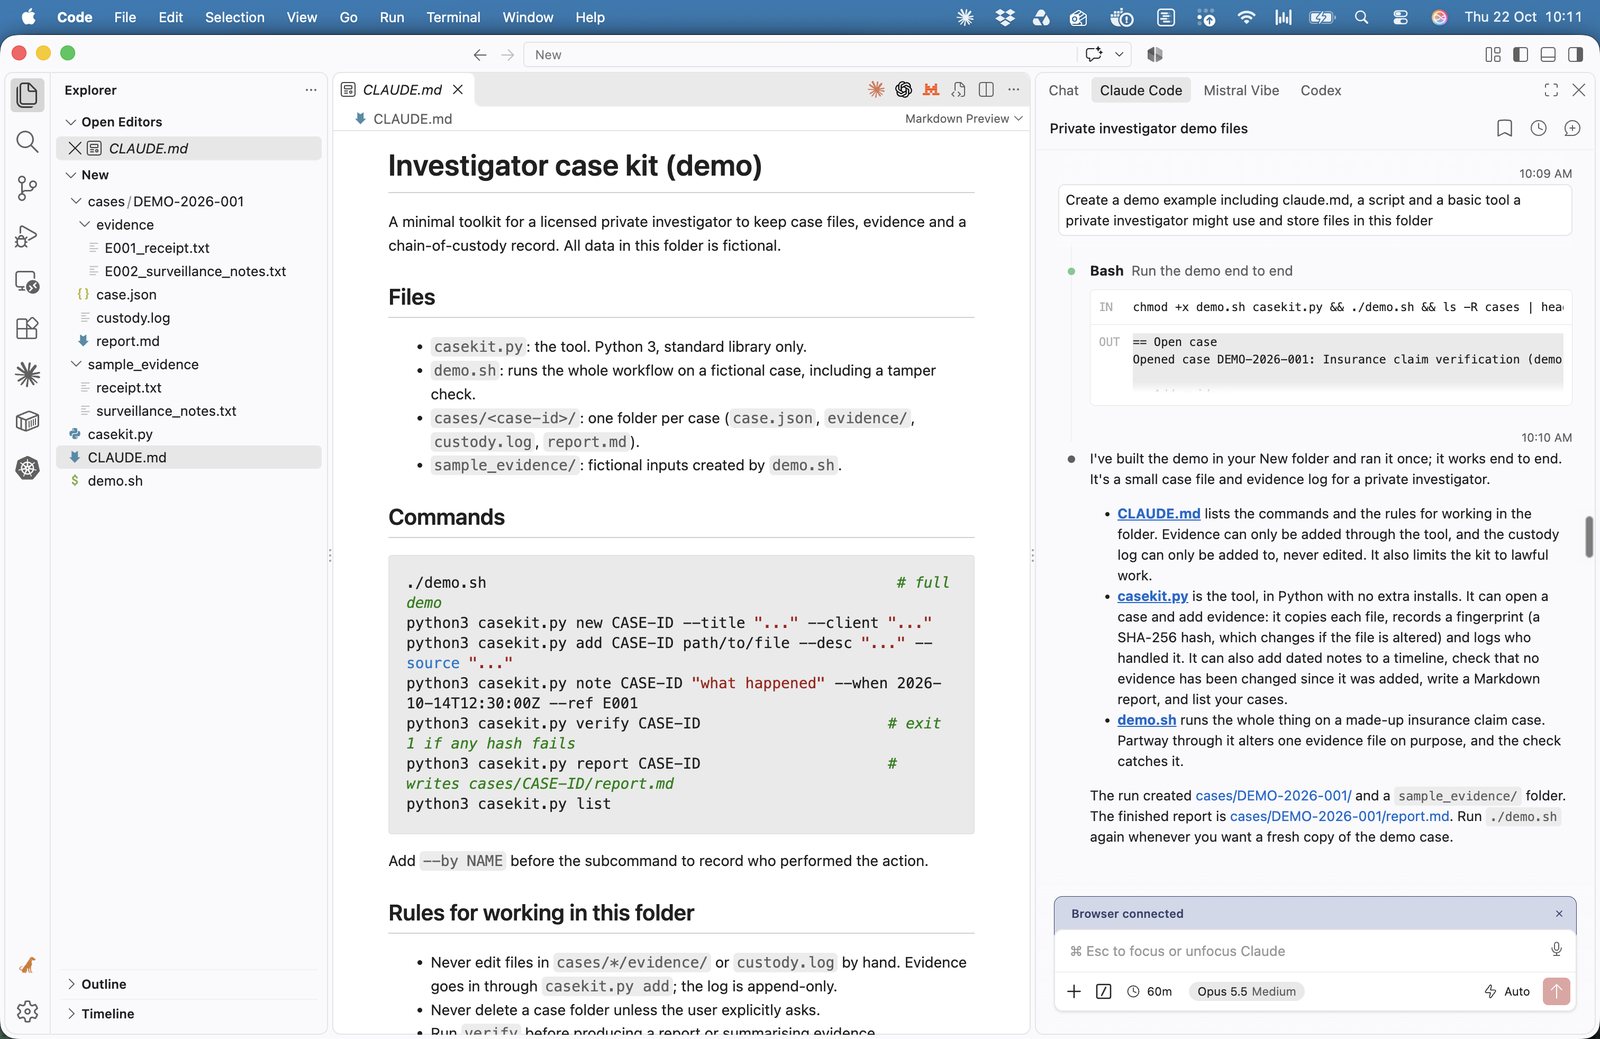
1Fig. 20 Expand the folders to see everything the run produced.
1A case folder with evidence files, a case record, a custody log and a report, all created by the task.
CLAUDE.md is the briefing file. Claude reads it at the start of every session in that folder. Here it holds the commands and the rules: evidence goes in only through the tool, the custody log is append-only, and the kit is for lawful work only. Edit it to brief Claude on how your team works.
Step 06
Run a task with Mistral Vibe
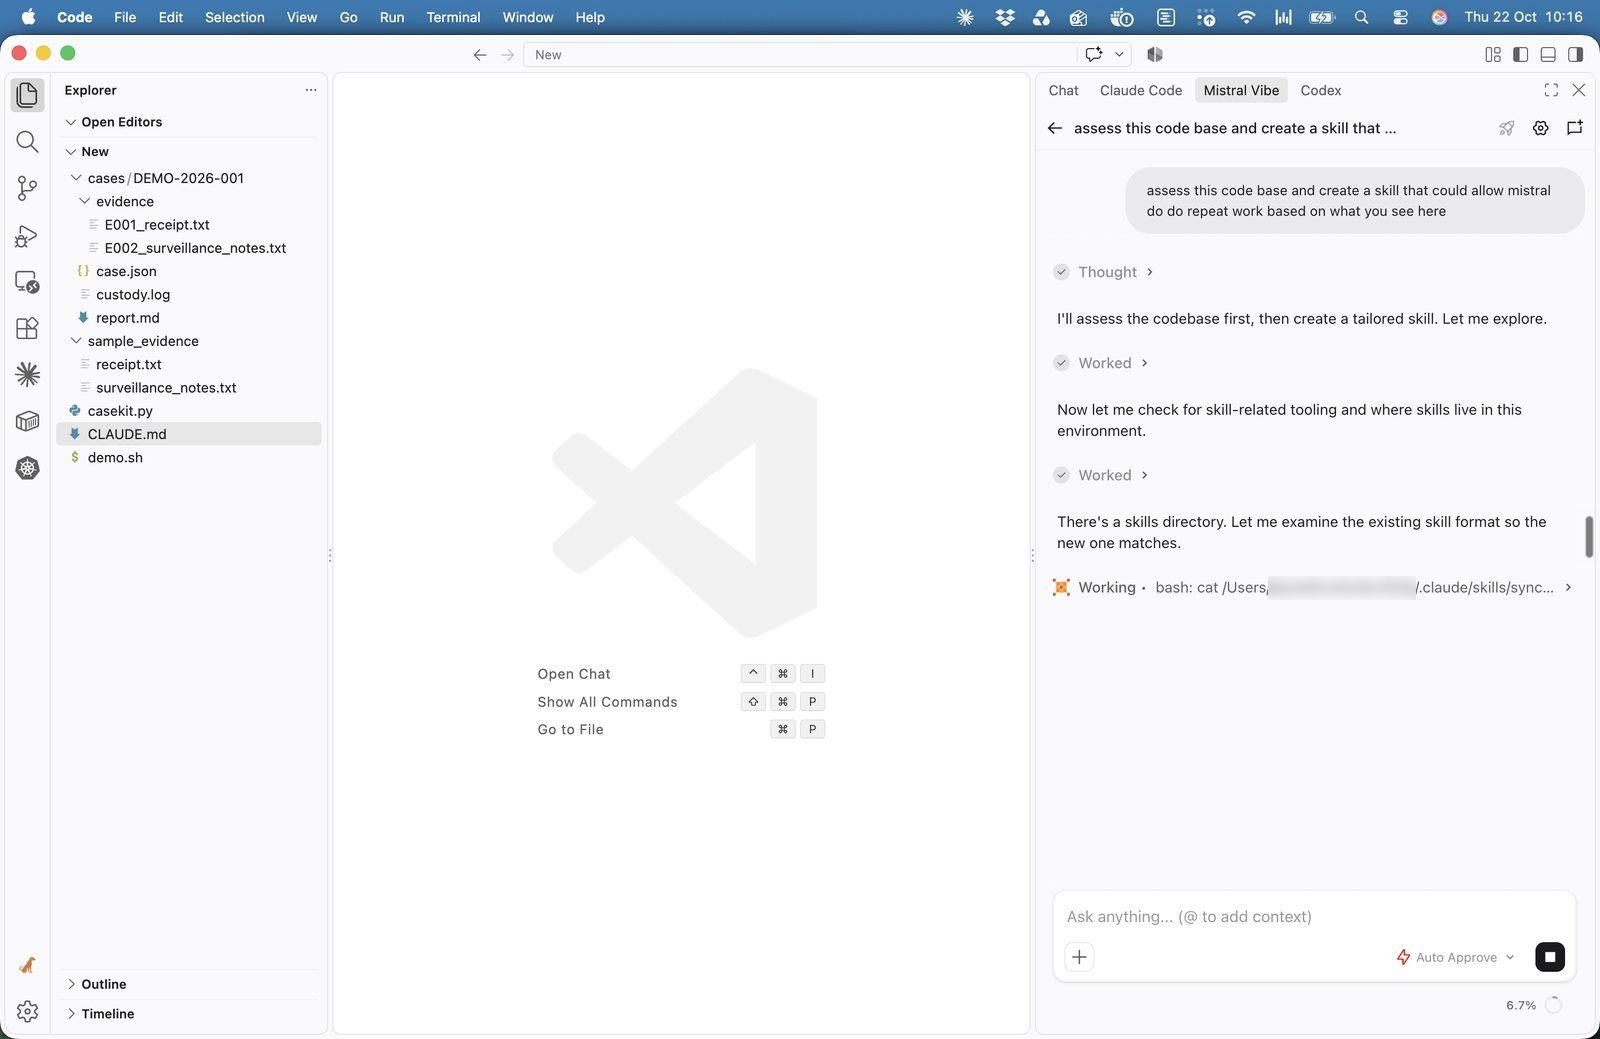
Mistral works on the same folder. Switch tabs and give it a task; here it builds a reusable skill from what Claude produced.
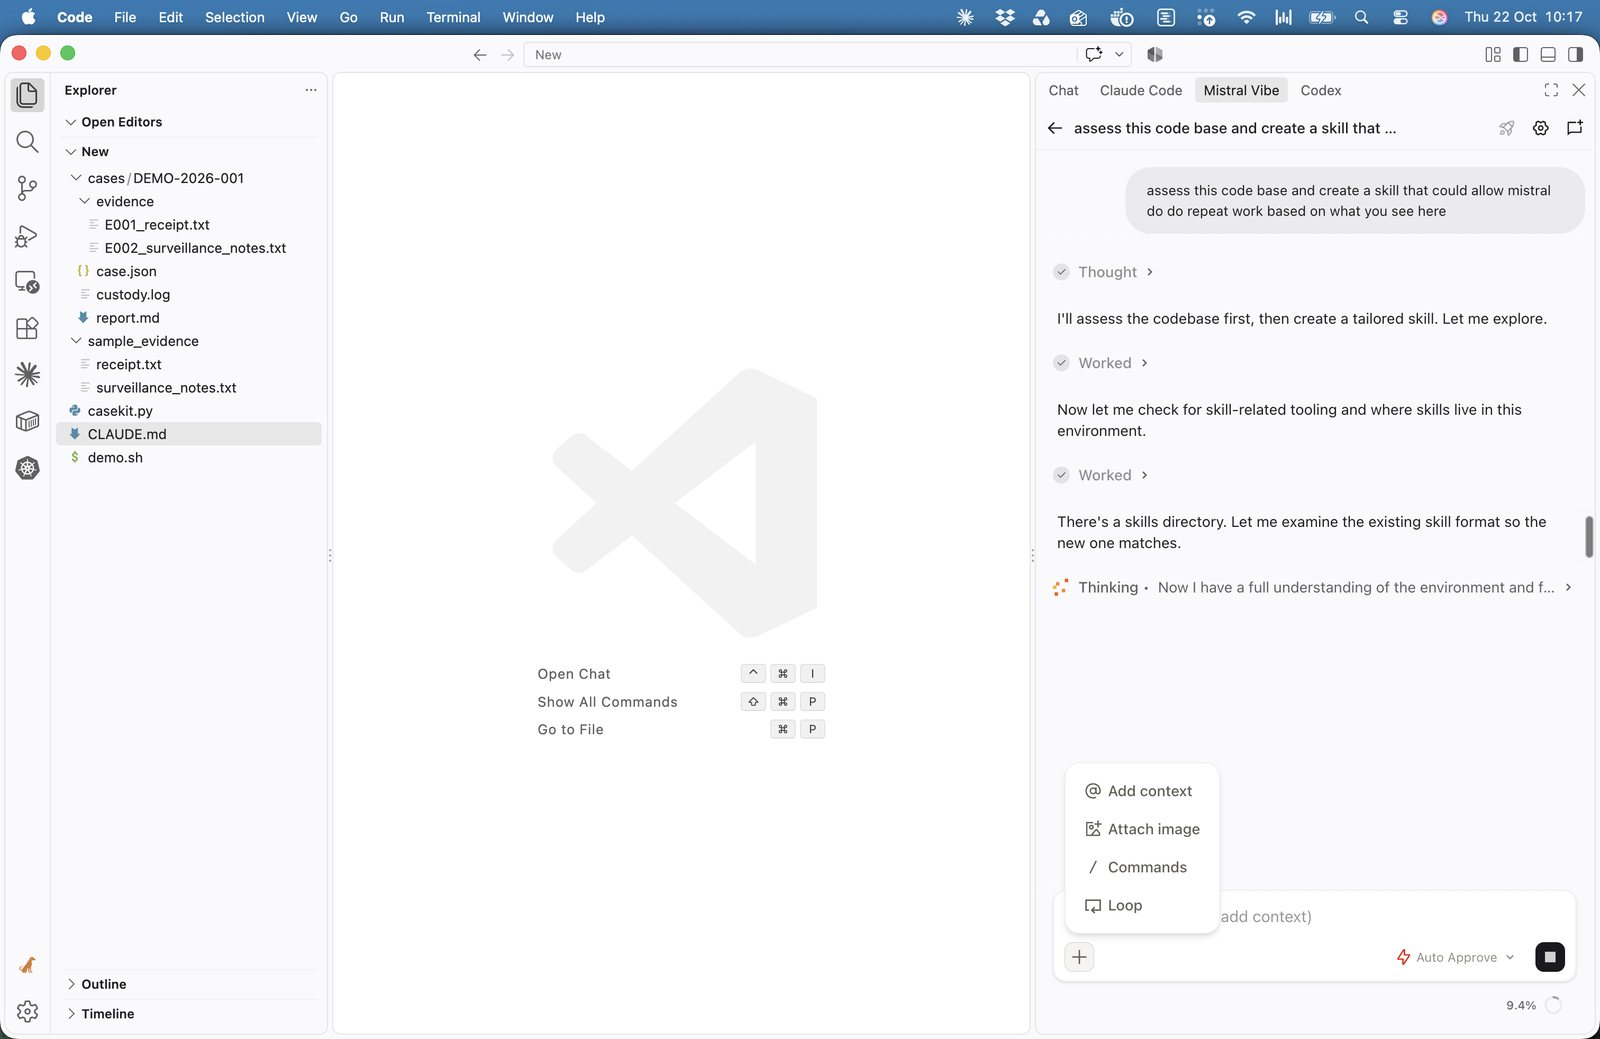
12Fig. 21 Mistral reads the folder before it acts.
1The request: assess the folder and create a skill for repeat work.
2The live status line shows each command Mistral runs.
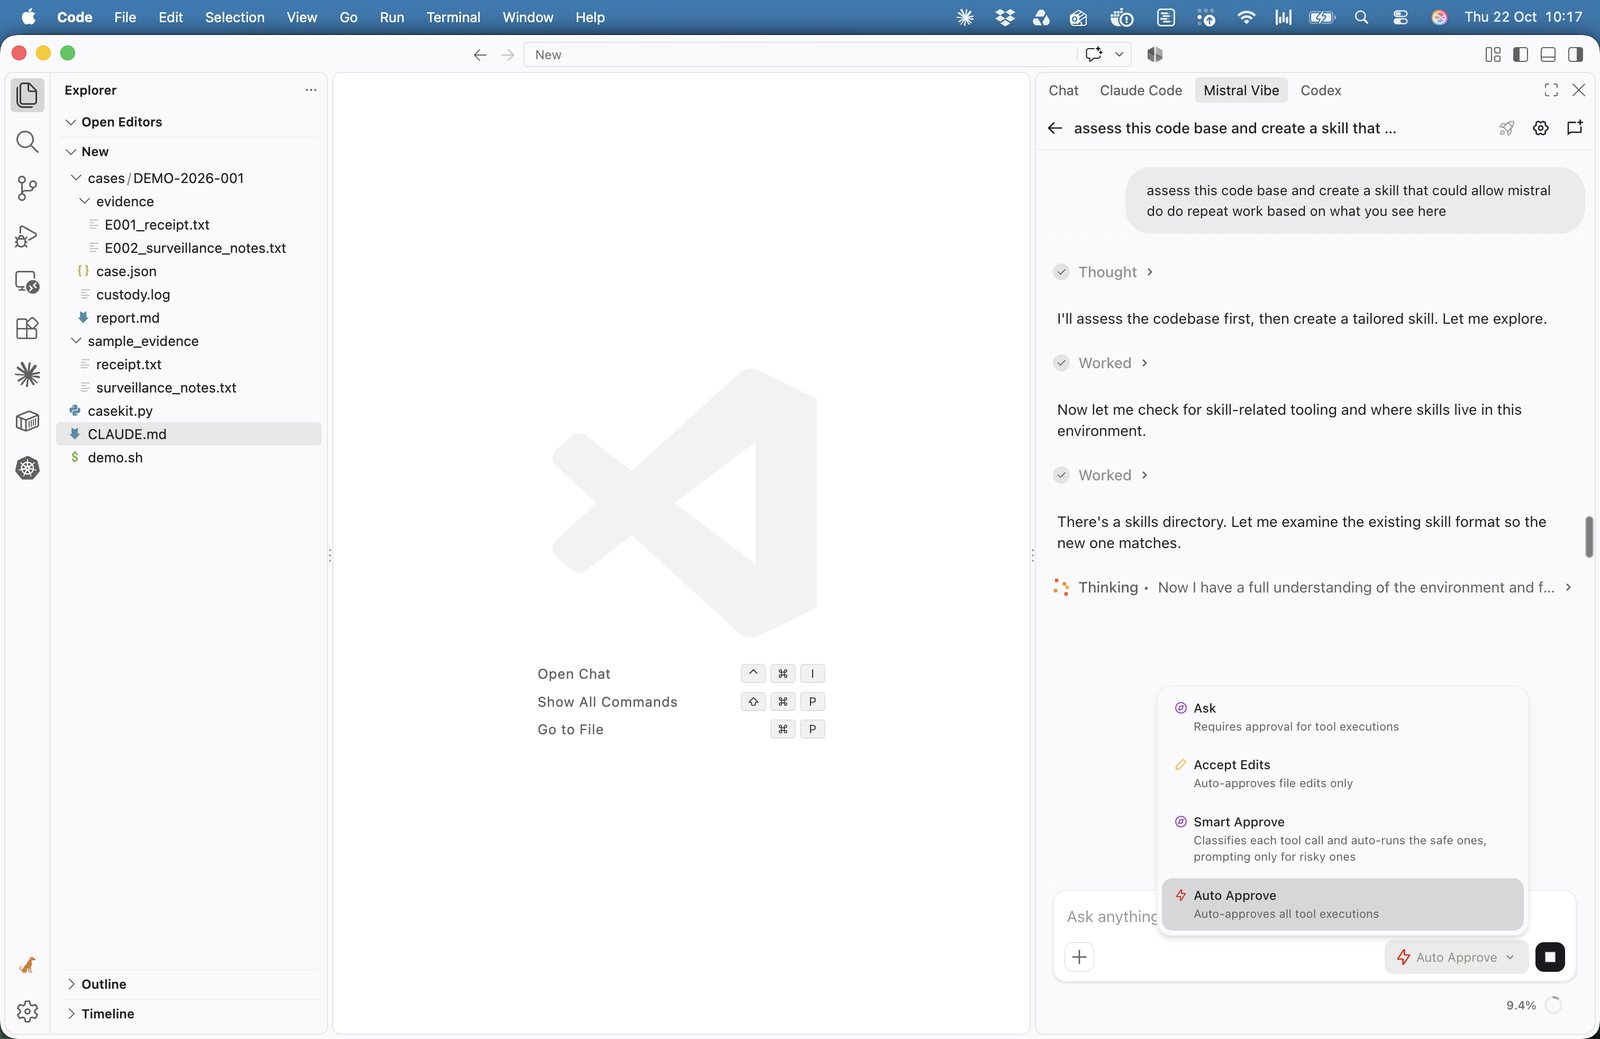
1Ask requires approval for every action; Accept Edits approves file edits only; Smart Approve prompts only for risky actions; Auto Approve runs everything.
2The current mode. Click to change it.
Choose the approval mode on purpose. In these screenshots both agents run in Auto. That is fine in a practice folder. With real case material, use Manual in Claude and Ask in Mistral until you trust the workflow, so every command waits for your approval. In Fig. 21, Mistral reads files outside the open folder; agents can reach anything your user account can.
Reference
Quick reference
Action
Mac
Windows
Show / hide file Explorer (left)
⌘B
Ctrl+B
Show / hide AI panel (right)
⌥⌘B
Ctrl+Alt+B
Open Extensions
⇧⌘X
Ctrl+Shift+X
Search every command
⇧⌘P
Ctrl+Shift+P
Switch Claude's mode
⇧Tab
Shift+Tab
If something is missing
No layout buttons: right-click the title bar and tick Layout Controls.
Agents missing and a Restricted Mode banner at the top: the folder isn't trusted. Click Manage and trust its parent folder (Fig. 7).
Extension installed but not showing: search every command for Developer: Reload Window.
Claude says “Not logged in”: reload the window; the sign-in screen reopens.
Mistral asks for a key every time: rerun setup from the Mistral Vibe panel and paste the key once.